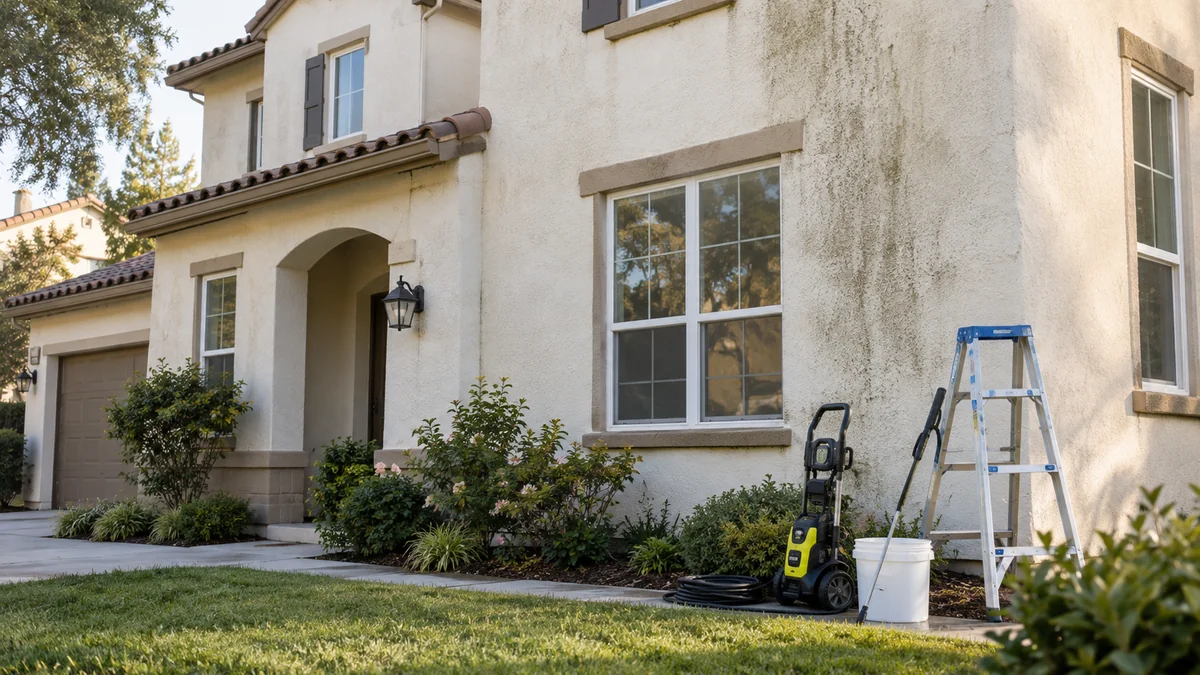
To clean exterior stucco without causing water intrusion, inspect and repair openings first, identify traditional stucco or EIFS, pre-wet absorbent surfaces, apply a compatible cleaner at low impact, and rinse with controlled flow away from joints and drainage openings. The safest method uses chemical dwell time rather than aggressive pressure, followed by a full drying inspection.
Key Facts at a Glance
- Exterior stucco cleaning is safest when chemistry removes organic growth and water pressure remains low and controlled.
- No pressure setting guarantees safety because damaged joints, failed flashing, and open cracks can admit water at garden-hose pressure.
- EIFS requires the cladding manufacturer’s cleaning instructions because its acrylic finish and foam insulation differ from cementitious stucco.
- Never spray upward into a stucco weep screed, window head flashing, vents, or unsealed penetrations.
- Chlorine bleach can kill algae and mildew, but it does not repair cracks, remove efflorescence, or solve the moisture source.
- A typical 2,000-square-foot home takes 4-8 labor hours to clean and costs about $50-$150 for DIY supplies or $300-$800 or more professionally.
What Prevents Water Intrusion During Stucco Cleaning?
Water intrusion prevention begins before cleaning. A sound stucco wall can usually tolerate careful wetting, but cracked render, failed sealant, missing flashing, blocked weep screeds, and poorly sealed windows can allow water behind the cladding even when the operator uses a garden hose.
The goal is controlled cleaning, not a completely dry wall. Stucco is porous by design, so some water absorption is normal. The risk rises when a concentrated stream drives water laterally or upward into joints, penetrations, trim, and drainage paths.
The most important practitioner rule is simple: clean the field of the wall gently, and treat every transition as a potential leak point. Transitions include window and door perimeters, roof-to-wall intersections, hose bibs, exterior lights, vents, utility penetrations, corners, and the bottom weep screed.
Which Stucco Type Are You Cleaning?
Traditional cementitious stucco and EIFS need different cleaning controls. Traditional stucco contains cementitious binders and aggregate; EIFS commonly uses foam insulation, a reinforced base coat, and an acrylic finish that can be damaged by impact or incompatible chemicals.
Identify the Wall System First
| Attribute | Traditional stucco | One-coat stucco | EIFS |
|---|---|---|---|
| Typical surface | Matte, mineral-like, porous | Cementitious textured finish | Acrylic, uniform, sometimes slightly flexible |
| Common assembly | Three coats over lath | Base and finish system | Foam, reinforced base coat, finish |
| Moisture behavior | Absorbs surface water | Absorbs surface water | Drainage details vary by system |
| Main cleaning risk | Erosion, staining, open cracks | Finish damage, cracks | Puncture, finish erosion, trapped moisture |
| Cleaning approach | Pre-wet and use low-impact rinse | Follow product instructions | Obtain manufacturer or EIFS contractor guidance |
A hollow sound can suggest EIFS, but it is not a reliable diagnosis by itself. Construction records, visible trim details, an experienced stucco contractor, or a small inconspicuous inspection area provide better evidence.
When Should You Stop Before Cleaning?
Stop when you find active leaks, soft or bulging areas, widespread delamination, exposed lath, crumbling substrate, missing flashing, or cracks that continue through trim and corners. Cleaning cannot correct a failed moisture-management assembly, and wetting a compromised wall may enlarge the damage.
For EIFS, stop if the finish has punctures, open joints, detached areas, or suspected moisture behind the system. The Exterior Insulation and Finish Systems Industry Members Association, known as EIMA, directs owners toward system-specific maintenance information rather than a universal cleaning recipe.
Before You Start: Time, Tools, and Safety
Plan one working day for a small home, although drying and repairs may extend the project across a weekend. Choose an overcast, mild day with no rain forecast during the cleaner’s dwell period or the initial drying period.
Preparation Checklist
| Item | Typical quantity or setting | Purpose |
|---|---|---|
| Garden hose with adjustable nozzle | 1, fan or shower setting | Pre-wetting and gentle rinsing |
| Pump sprayer | 1, 1-2 gallons | Controlled cleaner application |
| Soft nylon brush | 1, 10-18-inch head | Localized agitation |
| Exterior sealant | 1-3 tubes | Repairing small perimeter gaps |
| Chemical-resistant gloves and goggles | 1 set per worker | Personal protection |
| Plastic sheeting or drop cloths | 100-300 square feet | Protecting sensitive surfaces |
| pH strips or test kit | 1 pack | Checking rinse water when needed |
Wear eye protection, chemical-resistant gloves, long sleeves, and footwear with secure traction. Follow the cleaner’s Safety Data Sheet and never mix chlorine products with acids, ammonia, ammonium compounds, or unknown detergents. Chemical labels and local wastewater rules take priority over internet recipes.
Step 1: Inspect and Repair the Stucco
Walk the entire perimeter before applying water. Mark cracks, holes, failed caulk, damaged trim, rust sources, stained areas, and locations where the wall meets roofs, decks, windows, doors, and utility fixtures.
Small static hairline cracks may be repairable with a compatible acrylic or elastomeric product. A crack wider than approximately 1/16 inch, a recurring crack, a diagonal crack from a corner, or a crack with displacement deserves professional assessment before washing. Product instructions determine the correct cure time, often 24-72 hours.
You’ll know this step worked when: repaired areas are firm, fully cured, and free from visible openings.
Common mistake: sealing a wet or dirty crack. The patch can detach and hide a continuing moisture problem.
Step 2: Protect Openings, Plants, and Equipment
Close windows and doors. Protect exterior electrical outlets, light fixtures, cameras, door hardware, HVAC controls, and other sensitive equipment with appropriate coverings that do not trap heat or create electrical hazards.
Water plants thoroughly before cleaning, then cover delicate foliage only when the product label permits covering. Do not leave plastic over plants in direct sun. Move patio furniture, grills, and porous decorations away from the work zone.
Locate hose bibs, vents, dryer outlets, and weep screeds. The bottom weep screed must remain open because it drains incidental moisture from the wall assembly. Do not tape, caulk, or cover it.
You’ll know this step worked when: every opening has a defined protection method and runoff has a planned path away from doors, drains, ponds, and neighboring property.
Common mistake: sealing an electrical fixture with loose plastic that allows water to pool against the wall.
Step 3: Select the Cleaner for the Stain
Organic growth usually responds to a labeled exterior cleaner containing sodium hypochlorite or another registered biocidal active ingredient. General dirt may need only a mild detergent and water. Efflorescence and rust need different chemistry.
| Stain | Suitable starting treatment | Avoid | Typical dwell or action |
|---|---|---|---|
| Green algae | Labeled bleach-based exterior cleaner | Acid-only treatment | 5-15 minutes |
| Black mildew spots | Labeled biocidal cleaner | Aggressive abrasion | 10-20 minutes |
| Airborne dust | Mild neutral detergent | Strong oxidizer unnecessarily | 3-10 minutes |
| White efflorescence | Stucco-compatible sulfamic or phosphoric product | Chlorine bleach | Label-specific |
| Orange rust | Localized oxalic or commercial rust remover | Broad acid overspray | Often 1-5 minutes |
A common field dilution is approximately one part 6%-10% sodium hypochlorite product to three parts water, but concentration changes during storage, temperature changes the reaction rate, and product labels differ. Use the label’s dilution, contact time, and surface restrictions rather than treating the ratio as universal.
Use only a bleach-compatible surfactant. Ordinary dish soap is not automatically suitable, and products containing ammonia or amines can create hazardous chloramine gases when mixed with chlorine.
Step 4: Pre-Wet the Wall and Nearby Surfaces
Pre-wet traditional stucco from the bottom upward using a broad, low-impact spray. Saturating the surface reduces rapid, uneven absorption of cleaner and helps protect dry vegetation below the work area.
Pre-wetting does not mean flooding the wall. Avoid directing water into joints, vents, window heads, and the weep screed. EIFS should be pre-wet only according to its system guidance, because excessive water at damaged details can move behind the finish.
You’ll know this step worked when: the stucco darkens evenly without visible runoff entering openings, and plants and adjacent surfaces are wet before cleaner application.
Common mistake: using a narrow jet because it appears faster. A narrow jet concentrates impact and reaches defective joints more easily.
Step 5: Apply Cleaner in Small Sections
Work in sections about 6-10 feet wide so the cleaner remains wet during its contact period. Apply from the bottom upward when the product instructions support that method, which reduces dirty streaks caused by runoff over dry, soiled areas.
Use a pump sprayer or dedicated soft-wash equipment that produces a fan pattern rather than a concentrated stream. Keep the wand moving, maintain distance, and avoid spraying directly into window and door perimeters.
Let the product dwell for the labeled period, commonly 5-15 minutes for light organic growth and up to 20 minutes for heavier contamination. Never allow chlorine cleaner to dry on the wall. Mist lightly with clean water if drying begins, provided the product label permits it.
You’ll know this step worked when: algae loses its green color, surface dirt loosens, and the cleaner remains wet without pooling.
Common mistake: increasing chemical strength when the real problem is premature drying. Work smaller sections instead.
Step 6: Agitate Only Stubborn Areas
Use a soft nylon brush for isolated dirt that remains after chemical treatment. Brush lightly with overlapping strokes, and test an inconspicuous area first because textured finishes can release aggregate or show polished marks.
Do not use a wire brush, abrasive pad, rotary surface cleaner, or stiff masonry brush on a decorative finish. Mechanical abrasion can expose aggregate, remove color, and create a patch that remains visible after the wall dries.
You’ll know this step worked when: the stain releases without a change in texture or sheen.
Common mistake: scrubbing dead algae aggressively. Chemical treatment may kill the growth while leaving residue attached; gentle brushing is enough.
Step 7: Rinse With Controlled, Low-Impact Water
Rinse from the top downward using a broad fan of clean water. Keep the spray roughly parallel or at a shallow angle to the wall, and never direct water upward into weep screeds, flashing, vents, or the underside of window trim.
There is no universal safe PSI for every stucco wall. A well-maintained cementitious surface may tolerate carefully controlled pressure, while damaged stucco or EIFS can be harmed at much lower pressure. A garden hose or low-pressure pump system is the safer default; if a pressure washer is used, start at the lowest effective setting, use a wide-angle tip, keep the nozzle moving, and test first.
| Rinse method | Typical pressure or flow | Best use | Intrusion concern |
|---|---|---|---|
| Garden hose, fan spray | Household supply, often 40-80 PSI | Most residential rinsing | Lowest practical impact |
| Low-pressure pump rinse | Under about 300 PSI at the surface | Trained soft-wash operator | Low if transitions are avoided |
| Pressure washer, wide tip | Variable, start at minimum | Durable, sound cementitious areas | Moderate if misused |
| Narrow pressure-washer jet | Often 1,500 PSI or more | Not recommended for stucco | High erosion and intrusion risk |
The operator should measure pressure at the surface when possible, because pump ratings do not equal impact at the wall. A black 65-degree soap tip or broad fan is less aggressive than a yellow 15-degree or red 0-degree tip, but nozzle color is not a safety guarantee across brands.
You’ll know this step worked when: rinse water runs clear, no cleaner remains in the texture, and no water appears indoors or at interior trim.
Common mistake: rinsing upward beneath the weep screed. That can drive water into the drainage plane.
Step 8: Rinse Runoff, Inspect, and Dry
Rinse plants, soil, walkways, and equipment after cleaning. Remove coverings only after nearby surfaces are free of chemical residue, and restore electrical equipment only when dry and safe according to its instructions.
Inspect the interior side of exterior walls, windowsills, doors, and baseboards during and after rinsing. Keep the wall exposed to air while it dries. A typical cementitious wall may show darker damp areas for several hours; shaded or cool conditions can extend drying to 24-48 hours.
You’ll know this step worked when: no cleaner residue remains, the wall dries evenly, and no new interior staining, odor, bubbling paint, or damp trim appears.
Common mistake: judging the finish while wet. Efflorescence, streaking, and color variation may become visible only after complete drying.
Which Cleaning Method Has the Lowest Risk?
Manual cleaning has the lowest impact for small areas, while soft washing is usually the practical choice for widespread organic growth. High-pressure washing is the fastest way to remove surface soil mechanically, but it carries the greatest risk to stucco texture, joints, and water-management details.
| Method | Typical equipment | Typical cost | Suitable situation | Main limitation |
|---|---|---|---|---|
| Manual washing | Bucket, mild cleaner, brush, hose | $20-$75 | Small stains and sound surfaces | Slow and labor-intensive |
| Low-impact soft washing | Pump sprayer, labeled cleaner, hose | $50-$150 DIY | Algae and mildew on accessible walls | Requires chemical handling |
| Professional soft washing | Insured contractor, proportioner, rinse system | $300-$800+ | Whole-home or difficult access | Contractor quality varies |
| High-pressure washing | Pressure washer and narrow tips | $75-$250 rental | Generally poor choice for stucco | Erosion and intrusion risk |
Soft washing is not a guarantee of zero damage. A careless operator can still inject water into a failed seal, overexpose plants to oxidizer, or leave chemical residue. The method is safer because it reduces impact and uses dwell time, not because a company uses the word “soft.”
How Much Does Stucco Cleaning Cost and How Often Is It Needed?
Typical DIY supplies cost $50-$150, excluding a pressure washer or lift. Professional cleaning for a 2,000-square-foot home commonly costs $300-$800 or more, with access, height, heavy growth, repairs, travel, and regional labor rates affecting the final price.
| Condition | Typical cleaning interval | Likely extra work | Cost effect |
|---|---|---|---|
| Dry, sunny climate | 3-5 years | Dust rinsing | Low |
| Humid, shaded climate | 1-3 years | Algae treatment | Moderate |
| Coastal or salt-exposed site | 1-3 years | Freshwater rinsing | Moderate |
| Dense trees and pollen | 1-2 years | Organic stain removal | Moderate |
| Cracked or leaking wall | Do not schedule routinely | Repair and moisture diagnosis | High or unknown |
Clean by condition rather than by calendar alone. Persistent algae often indicates shade, slow drying, leaking gutters, overspray from irrigation, or vegetation touching the wall. Correcting that source extends the interval more effectively than applying stronger chemicals.
Common Problems and Safe Fixes
Green Growth Turned Brown but Remains Attached
The cleaner may have killed the algae without removing its residue. Apply a compatible light solution again, allow the labeled dwell time, brush gently with nylon, and rinse broadly. Do not increase pressure simply because the dead material remains visible.
White Powder Appeared After Drying
White powder is commonly efflorescence, which is soluble salt transported to the surface by moisture. Chlorine does not remove its cause. Dry-brush lightly first, identify the moisture source, and use only a stucco-compatible efflorescence cleaner according to its label.
Rust Streaks Remained
Rust usually comes from a metal fastener, fixture, gutter, or irrigation component. Remove or correct the source, then spot-test a commercial rust remover. Acidic products can discolor cementitious finishes and damage nearby metal, glass, plants, and sealants.
Water Appeared Indoors
Stop immediately and document the location, spray direction, weather, and time. Dry the area, inspect interior trim and insulation if accessible, and contact a building-envelope contractor when staining, damp insulation, swelling, musty odor, or repeated leakage occurs.
Stucco Texture Looks Eroded
Erosion indicates excessive impact, an unsuitable tip, or a deteriorated surface. Do not repaint immediately. Allow the wall to dry, photograph the damage, and have a stucco contractor assess whether the finish needs patching, recoating, or broader repair.
How Should You Hire a Stucco Cleaning Contractor?
Ask for proof of liability insurance, stucco or EIFS experience, the proposed cleaner and dilution, the planned surface pressure, protection procedures, and a written statement covering damage to windows, plants, paint, and wall finishes.
A responsible contractor should inspect before quoting. Reject proposals that promise to blast the wall clean, give only a machine PSI rating without discussing surface impact, spray upward into drainage openings, or refuse a small test area.
Ask these specific questions:
- Is the wall traditional stucco, one-coat stucco, or EIFS?
- What product label controls your dilution and dwell time?
- How will you protect weep screeds, windows, plants, and electrical fixtures?
- What pressure and nozzle will reach the wall surface?
- How will you respond if water enters or damaged stucco is found?
- Will the quote include post-rinse cleanup and an inspection after drying?
Situational Adjustments
Cleaning EIFS
Use the EIFS manufacturer’s maintenance instructions or an experienced EIFS contractor. Avoid concentrated pressure, aggressive brushes, strong solvents, and unapproved acids. EIFS cleaning should preserve the finish while keeping water away from failed joints and drainage details.
Cleaning on a Hot, Sunny Day
Work on the shaded side first, reduce section size, and prevent cleaner from drying. Early morning may reduce evaporation, but avoid starting when dew will dilute the product or when weather prevents adequate drying.
Cleaning Near a Pond or Sensitive Landscaping
Use the least toxic labeled method that will remove the stain, contain runoff, and follow local discharge rules. Manual cleaning may be preferable to chlorine-based treatment near aquatic life. Never assume dilution makes chemical runoff harmless.
Cleaning a Wall With Existing Mold Inside
Exterior washing does not remediate interior mold or identify the moisture source. Address the leak, dry affected materials, and use a qualified indoor environmental professional when mold affects porous insulation, drywall, or large areas.
FAQ
Can I use a regular pressure washer on stucco?
A regular pressure washer is not automatically safe for stucco. A broad fan, low surface pressure, adequate distance, and a sound wall may reduce risk, but damaged stucco, EIFS, joints, and flashing can be harmed by much less force. A garden hose is the safer default for most homeowners.
Does bleach damage exterior stucco?
Properly diluted, labeled bleach-based cleaner can remove algae and mildew from many cementitious stucco surfaces, but it can discolor finishes, harm plants, corrode metals, and damage some coatings. Bleach does not remove efflorescence or repair water intrusion, and it must never contact acids or ammonia.
Should I clean stucco before repairing cracks?
Repair cracks and open joints before full cleaning when water could enter through them. Remove loose contamination around the repair, follow the sealant or patch manufacturer’s preparation requirements, allow the repair to cure fully, and then use controlled wetting rather than blasting the repaired area.
How long does stucco take to dry after washing?
Typical drying takes several hours in warm, ventilated conditions and 24-48 hours in shade, cool weather, or high humidity. Darker color alone does not prove damage. Check interior trim and wall surfaces for dampness, swelling, odor, or staining during drying.
Can I use vinegar to clean stucco?
Vinegar is acidic and can etch or discolor cementitious stucco, especially when concentrated or left to dwell. It is not a dependable treatment for deep algae or mildew. Use a mild labeled cleaner for general dirt and a stucco-compatible product for specialized stains.
How often should exterior stucco be cleaned?
Many homes need cleaning every 2-3 years, but the interval varies from roughly 1 year in shaded, humid conditions to 5 years in dry, sunny conditions. Gutters, irrigation, vegetation, drainage, and wall repairs influence recurrence more than a fixed schedule.
The Bottom Line
To follow how to clean exterior stucco without causing water intrusion, inspect and repair defects, identify the wall system, protect every opening, use labeled chemistry, pre-wet carefully, keep cleaner from drying, and rinse downward with low impact. Do not spray into weep screeds or assume a PSI number makes damaged stucco safe. If the wall leaks, bulges, crumbles, or contains EIFS defects, stop cleaning and obtain a building-envelope assessment.