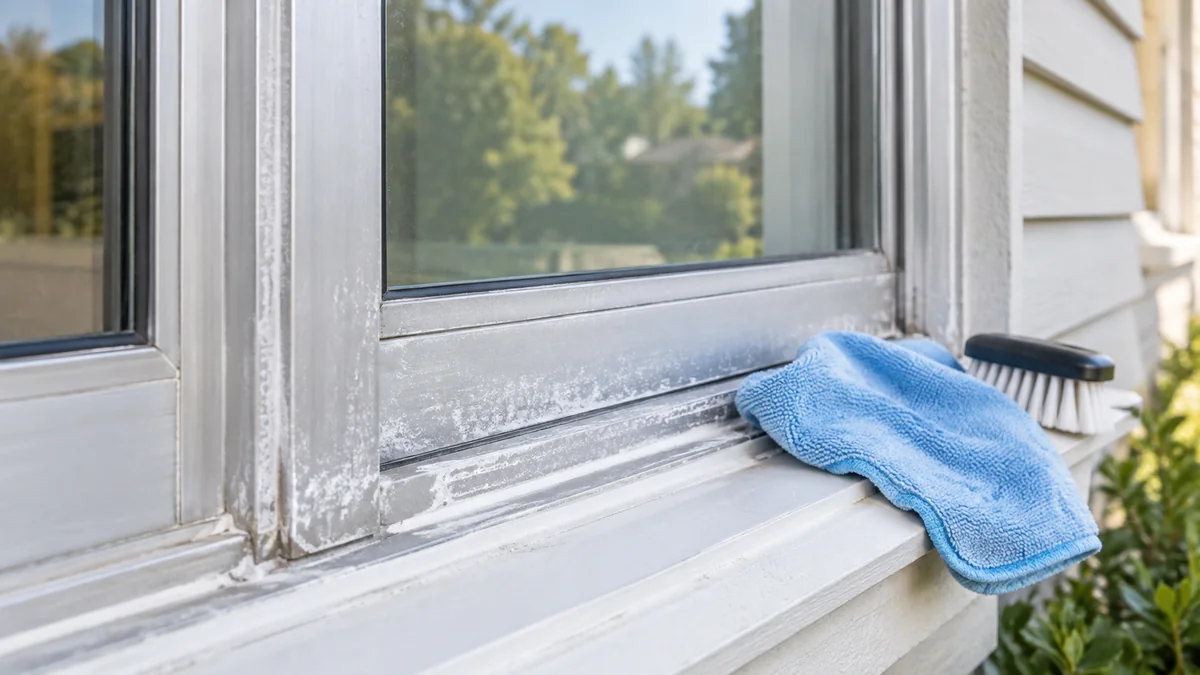
Removing chalky oxidation from aluminum window frames requires washing away surface contamination, dissolving or loosening the aluminum oxide with a mild cleaner, gently scrubbing the residue, rinsing completely, and protecting the exposed surface. A light buildup usually takes 20-40 minutes per window. Painted, anodized, and heavily pitted frames require different treatment.
Key Facts at a Glance
- Chalky white residue on bare aluminum is usually hydrated aluminum oxide, often mixed with dirt, salts, and detergent deposits.
- White vinegar can help with light oxidation, but it will not restore deeply pitted aluminum or failed paint.
- Nylon pads and plastic brushes are safer than sandpaper, green abrasive pads, or coarse steel wool.
- Acidic cleaner must remain wet for only a short labeled dwell time and must be rinsed before it dries.
- Anodized and painted frames can be permanently dulled or stripped by aluminum brighteners.
- A protective wax or compatible aluminum sealant slows renewed chalking but does not repair structural corrosion.
What Is Chalky Oxidation on Aluminum?
Chalky oxidation is a loose, pale deposit formed when exposed aluminum reacts with oxygen and moisture. The main corrosion product is aluminum oxide, commonly mixed with aluminum hydroxide, airborne dust, salts, and residue from hard water or cleaning products.
Aluminum differs from iron because its oxide layer can form a thin passive barrier. That layer often slows deeper corrosion. However, moisture trapped beneath dirt, salt, failed coatings, or dissimilar metals can produce pits, white scale, swollen joints, and damaged fasteners.
A powder that wipes onto a dry finger usually indicates surface oxidation. Dark pits, flaking coating, bubbling paint, or powder returning within days indicate a finish or corrosion problem rather than ordinary dirt.
How can you distinguish oxidation from failed paint?
Rub a hidden dry area with a clean white cloth. White powder without colored coating suggests oxidation or chalking. A frame that transfers its original bronze, white, or gray color may have a failing painted finish.
Do not use an acid cleaner on an unidentified colored frame until a small test patch confirms compatibility. A cleaner that is acceptable for mill-finish aluminum can permanently change anodized bronze or painted aluminum.
Before You Start
The safest restoration begins with finish identification and protection of nearby materials. Use the least aggressive method that removes the deposit, because aluminum and its coatings can be scratched or chemically etched faster than many homeowners expect.
Materials and typical preparation
| Item | Typical quantity per window | Purpose | Typical cost |
|---|---|---|---|
| Warm water | 1-2 liters | Washing and final rinsing | $0-$1 |
| Mild dish detergent | 5-10 milliliters | Removing grease and soil | $0.10-$0.50 |
| White vinegar, 5% acidity | 250-500 milliliters | Light oxidation treatment | $1-$3 |
| Nylon pad or soft plastic brush | 1 | Mechanical lifting | $2-$6 |
| Microfiber cloths | 3-5 | Washing, drying, and buffing | $3-$10 |
| Painter’s tape and plastic sheeting | 1 set | Protecting glass and masonry | $3-$10 |
| Aluminum sealant or compatible wax | 15-30 milliliters | Slowing renewed oxidation | $8-$30 |
Wear nitrile gloves and eye protection. Ventilate enclosed areas. Read the product label and Safety Data Sheet for any commercial cleaner, especially if it contains hydrofluoric acid, strong mineral acids, or caustic alkalis.
Never mix acid cleaners with bleach, ammonia, or other household chemicals.
Step 1: Identify the Frame Finish
Inspect an upper corner, concealed channel, or removable stop before applying any cleaner. Bare mill-finish aluminum appears silver or dull gray. Anodized aluminum has a relatively uniform metallic color, while painted aluminum has an opaque film that may chip, blister, or transfer pigment.
| Frame condition | First treatment | Avoid initially | Likely result |
|---|---|---|---|
| Bare silver aluminum, light powder | Soap, water, diluted vinegar | Coarse abrasives | Cleaner matte or brighter surface |
| Bare aluminum, thick crust | Labeled aluminum cleaner and nylon pad | Undiluted acid and long dwell time | Reduced scale, pits may remain |
| Dark bronze anodized | Neutral detergent and soft cloth | Brightener, steel wool, polish | Cleaner surface without color change |
| White painted aluminum | Detergent and soft brush | Acid and metal polish | Cleaner paint, oxidation may remain beneath |
| Flaking or blistered coating | Coating assessment | Aggressive scrubbing | Repair or refinishing may be needed |
A test patch is mandatory for colored, painted, anodized, or architecturally finished frames. Apply the chosen product to an inconspicuous 5-centimeter area, rinse, dry, and inspect under the same light used to judge the finished window.
Step 2: Protect Glass, Masonry, and Hardware
Cover the glass edge, sill, adjacent brick, stone, wood, and painted siding with plastic sheeting. Painter’s tape can protect narrow borders, but tape alone does not control liquid runoff.
Keep cleaner out of weep holes, rollers, locks, hinges, weatherstripping, and drainage channels. Acidic or alkaline residue can corrode steel fasteners, harden rubber, stain masonry, or interfere with window drainage.
Open the sash if safe, and place an absorbent towel below the work area. Do not block the frame’s drainage openings permanently. Water must still escape after cleaning.
Step 3: Wash Away Dirt and Salts
Mix 5-10 milliliters of mild dish detergent with 1 liter of warm water. Wash the frame from top to bottom using a microfiber cloth or soft nylon brush, then rinse with clean water and dry completely.
The first wash matters because grit turns into abrasive paste during scrubbing. Salt deposits can also react with a cleaner and make the surface appear worse than it is.
You will know the frame is ready when a dry cloth removes little loose dirt and the surface no longer feels greasy. If the white deposit disappears during washing, oxidation was not the main problem.
Step 4: Apply a Mild Oxidation Cleaner
For light oxidation on bare, uncoated aluminum, mix equal parts white vinegar and water in a labeled container. Apply enough to wet a small section, approximately 30-60 centimeters wide, rather than flooding the entire frame.
Allow a 2-5 minute dwell time while keeping the surface visibly wet. Do not let vinegar or commercial cleaner dry on the frame. A labeled commercial aluminum cleaner may work faster, but its dilution, dwell time, and finish compatibility must come from the manufacturer.
| Condition | Cleaner approach | Dwell time | Maximum initial area |
|---|---|---|---|
| Light white haze | 1:1 vinegar and water | 2-3 minutes | 30-60 cm |
| Moderate loose scale | 1:1 vinegar and water, repeated | 3-5 minutes | 30-60 cm |
| Heavy bare-aluminum crust | Labeled aluminum cleaner | Label direction | 30 cm test area |
| Painted frame | Detergent only initially | 1-2 minutes | 30 cm test area |
| Anodized frame | Neutral cleaner only initially | 1-2 minutes | 30 cm test area |
Vinegar is acetic acid, not a guaranteed aluminum-restoration product. It can loosen light deposits, but repeated or concentrated acid exposure may dull some finishes and cannot rebuild missing metal.
Step 5: Scrub With the Least Aggressive Tool
Use a white nylon scrubbing pad, soft nylon brush, or plastic detailing brush while the cleaner remains wet. Work in the direction of the frame’s existing grain, using short overlapping strokes and moderate hand pressure.
Start with one pass, rinse the section, and inspect it before increasing pressure. Repeated short applications are safer than one long soak.
You will know the process is working when the chalky film becomes a wet gray slurry and the original surface texture becomes visible. Stop if the finish changes color, becomes streaky, or transfers onto the pad.
Which abrasive is safe for aluminum?
A white nylon pad or plastic brush is the safest general choice. Fine polishing compounds can improve bare aluminum after chemical cleaning, but they are unsuitable for many anodized and painted finishes.
Fine steel wool is often recommended for bare aluminum, but it is not a risk-free default. Steel fibers can scratch soft aluminum, leave embedded ferrous particles, and damage anodized or painted surfaces. Use it only on confirmed bare aluminum, with minimal pressure, and prefer a nonwoven nylon pad first.
| Tool | Approximate aggressiveness | Suitable surface | Main risk |
|---|---|---|---|
| Microfiber cloth | 1 of 5 | Painted, anodized, bare | Limited scale removal |
| Soft plastic brush | 2 of 5 | All finishes after testing | Can trap grit |
| White nylon pad | 3 of 5 | Tested bare aluminum | Satin scratches if pressed hard |
| Fine aluminum polish | 3-4 of 5 | Bare aluminum only | Uneven sheen and black residue |
| 0000 steel wool | 4 of 5 | Confirmed bare aluminum | Scratches and iron contamination |
| Sandpaper or green pad | 5 of 5 | Refinishing preparation only | Visible scratches and coating loss |
Step 6: Rinse, Inspect, and Dry Completely
Rinse each completed section with generous clean water before moving to the next area. Wipe the frame with a clean microfiber cloth, then allow hidden channels and joints to dry.
Rinsing stops the cleaner from continuing to react with the surface. It also removes loosened salts that could otherwise create another white deposit.
Inspect the dry aluminum at an angle. A uniform dull finish is usually acceptable after cleaning. Dark pits, deep grooves, flaking material, or exposed fasteners require more than surface cleaning.
Step 7: Polish Bare Aluminum Only When Needed
Use a small amount of aluminum polish on confirmed bare aluminum if cleaning leaves mild gray staining or an uneven appearance. Work a 10-15-centimeter section at a time with a microfiber cloth, then remove the black residue before it dries into adjacent seams.
Polishing is cosmetic. It can smooth shallow oxidation marks and increase reflectivity, but it cannot replace metal lost to pitting. Do not polish painted or anodized aluminum unless the coating manufacturer specifically approves that product.
A mirror finish is also not always the original finish. Many window frames were designed with a brushed, satin, or anodized appearance. Over-polishing one section can create a bright patch that is more noticeable than the original oxidation.
Step 8: Apply a Compatible Protective Coating
Apply a thin coat of aluminum-compatible wax or dedicated sealant after the surface is clean and completely dry. Follow the product’s curing and buffing instructions, and keep protection away from weatherstripping and drainage openings.
A protective film reduces contact with oxygen, water, salt, and airborne contaminants. It does not stop corrosion caused by leaking glazing, trapped water, dissimilar-metal contact, or failed paint.
Typical protection intervals range from 3-12 months, depending on exposure. Coastal air, pool chemicals, roof runoff, and frequent washing usually shorten the interval.
Which Cleaning Method Should You Choose?
The best method depends on finish, deposit thickness, and the finish you want afterward. Vinegar is the lowest-cost option for light oxidation on bare aluminum. A labeled commercial cleaner saves labor on thicker scale, while polish is a finishing step rather than a substitute for cleaning.
| Method | Typical cost | Time per window | Best use | Main limitation |
|---|---|---|---|---|
| Detergent and nylon brush | $0-$6 | 10-20 minutes | Dirt and light chalking | Limited on bonded scale |
| Diluted white vinegar | $1-$5 | 20-40 minutes | Light bare-aluminum oxidation | Repeated scrubbing required |
| Commercial aluminum cleaner | $15-$40 | 25-50 minutes | Moderate bare-aluminum scale | Can etch finishes and masonry |
| Aluminum polish | $8-$30 | 30-60 minutes | Bare-aluminum staining | Cannot repair deep pits |
| Professional restoration | $150-$600+ | 1-3 days | Large areas or severe damage | Higher cost and possible refinishing |
Commercial cleaners are not interchangeable. Some are brighteners intended for bare aluminum; others are degreasers or alkaline cleaners that can darken or attack certain surfaces. Product names and formulas vary by country, so the label’s approved materials matter more than a retailer’s category.
How Much Time and Money Does the Job Require?
A typical homeowner spends 20-40 minutes and $2-$15 on a lightly oxidized window, excluding equipment already owned. Heavy scale, polishing, repeated rinsing, and masking can raise the time to 45-90 minutes per window.
| Project size | Light oxidation time | Heavy oxidation time | Typical consumable cost |
|---|---|---|---|
| One small window | 20-30 minutes | 45-75 minutes | $2-$15 |
| One large sliding window | 30-45 minutes | 60-90 minutes | $4-$25 |
| Four standard windows | 2-3 hours | 4-6 hours | $10-$60 |
| Ten standard windows | 5-8 hours | 1-2 workdays | $25-$150 |
These are typical working ranges, not guaranteed prices. Access height, finish testing, pitting, product availability, and local labor rates change the total.
How Should Painted and Anodized Frames Be Treated?
Painted and anodized frames should begin with neutral detergent, water, and a soft brush, not an acid brightener. The white appearance may be coating chalk, mineral residue, or corrosion beneath a damaged coating, and aggressive cleaning can remove the remaining finish.
Painted frames
Clean a painted frame with diluted detergent, rinse, and inspect for flaking, bubbling, or exposed metal. If the paint is chalking, a compatible coating-restoration or repainting system may be required after preparation.
Do not use aluminum polish to restore painted frames. Polish removes or abrades material and can leave a shiny patch that cannot be blended easily.
Anodized frames
Anodizing is an electrochemically formed aluminum oxide layer that is integrated with the surface. Abrasion and strong cleaners can change its color or sheen permanently.
Use a neutral cleaner and soft cloth first. If white deposits remain, consult the window or finish manufacturer before using an acid-based product. A successful test on one anodized frame does not guarantee compatibility with another color or coating age.
What Problems Occur During Cleaning?
Most poor results come from treating a finish problem as bare aluminum oxidation. The second common cause is allowing cleaner to dry, which concentrates active ingredients at the edge of the wet area and creates streaks.
| Symptom | Likely cause | Corrective action |
|---|---|---|
| White powder returns within days | Ongoing moisture, salt, or failed coating | Inspect leaks, rinse residue, and assess coating |
| Surface looks patchy | Uneven dwell time or incomplete cleaning | Reclean small sections, not the whole frame |
| Frame turns darker | Incompatible cleaner or anodized reaction | Stop, rinse thoroughly, and avoid further chemicals |
| Black residue appears | Aluminum polish lifting oxidized material | Use clean cloth sections and remove residue promptly |
| Glass looks cloudy | Chemical etching or mineral film | Rinse immediately; professional glass polishing may be needed |
| Window still sticks | Oxidation inside track or damaged rollers | Clean track separately and inspect hardware |
A recurring deposit is not automatically evidence that the first rinse failed. Salt spray, condensation, leaking sealant, and deteriorating paint can create new powder after a correctly completed cleaning.
Can Oxidation Stop a Window From Operating?
Oxidation can restrict movement when powder and grit collect in the track, roller channel, lock recess, or weep system. Cleaning the visible frame alone may leave the mechanical cause untouched.
Vacuum loose debris first. Wash the track with detergent solution, wipe it dry, and inspect rollers and fasteners. Do not flood the lock body or apply wax where rollers must rotate. Use a lubricant only if the hardware manufacturer permits it, because some oils attract abrasive dust.
If the sash remains difficult to move after cleaning, damaged rollers, swollen weatherstripping, frame distortion, or structural corrosion may be responsible.
When Is Cleaning Not Enough?
Cleaning is not enough when aluminum has deep pits, perforations, loose joints, severe galvanic corrosion, or a coating that is flaking across large areas. Pits that catch a fingernail, metal loss around fasteners, and water entering the building justify a window contractor or metal-restoration specialist.
A specialist may strip and refinish the frame, replace corroded hardware, repair drainage, or recommend replacement. Polishing cannot restore missing aluminum, and sealant cannot make a structurally weakened frame safe.
Common Mistakes and How to Fix Them
- Using undiluted vinegar for a long period: Rinse immediately, wash with detergent, and test a shorter diluted application.
- Scrubbing dry deposits: Re-wet the section and remove grit with a wash first; dry abrasion creates scratches.
- Using a green abrasive pad: Stop before enlarging the damaged area. A uniform refinish may be needed for visible scratches.
- Applying brightener to painted or anodized aluminum: Rinse thoroughly and document the finish change before seeking manufacturer guidance.
- Ignoring runoff: Flush glass, masonry, and sill edges with clean water before cleaner dries.
- Sealing dirty metal: Remove wax or sealant, clean the residue, and reseal only after the surface is dry and uniform.
How Do You Maintain Clean Aluminum Frames?
Rinse exposed frames every 1-3 months in coastal or poolside locations and inspect them twice yearly in ordinary inland conditions. Clean bird droppings, salt spray, fertilizer residue, and roof runoff promptly because concentrated contaminants remain wet against the metal.
Use neutral detergent for routine washing. Reserve acidic cleaners for visible oxidation and repeat the small-section test each time the product, frame finish, or environmental exposure changes.
A light protective coating may last several months, but its actual life depends on sun, rain, salt, abrasion, and product chemistry. Reapply when water no longer beads consistently and the surface begins to chalk, not after heavy pitting has already developed.
FAQ
Can lemon juice remove oxidation from aluminum window frames?
Lemon juice contains citric acid and may loosen very light deposits on bare aluminum, but its concentration varies and its sugars can leave residue. Diluted white vinegar is more predictable for a small test area. Neither product repairs pitting, failed paint, or corrosion caused by trapped moisture.
Is baking soda safe for aluminum window frames?
Baking soda is mildly abrasive and alkaline, so it is not the best primary oxidation remover. It may help neutralize residual acid after a thorough rinse, but mixing it directly with vinegar mostly consumes the acid and creates foam rather than delivering sustained cleaning action.
Can pressure washing remove aluminum oxidation?
Pressure washing can remove loose dirt but may drive water into tracks, seals, weep holes, and wall cavities. High pressure can also strip paint or damage weatherstripping. Use low-pressure water for rinsing, keep the nozzle away from joints, and rely on controlled hand cleaning for oxidation.
Why does aluminum oxidation return after sealing?
Oxidation returns when moisture, salt, chemical residue, or coating failure continues beneath or around the cleaned area. A sealant slows exposure but cannot stop leakage, galvanic corrosion, or deteriorating paint. Inspect joints, fasteners, drainage, and nearby masonry when chalking returns unusually quickly.
Can aluminum polish be used on dark bronze window frames?
Aluminum polish should not be used on dark bronze anodized or painted frames unless the manufacturer approves it. Polishing can remove the colored surface layer and create a bright, irregular patch. Use neutral detergent first and confirm the finish before selecting any abrasive product.
Should you replace a window with heavily oxidized aluminum?
Replace or professionally restore the window when corrosion causes holes, loose frame joints, failed drainage, distorted tracks, or water intrusion. Surface chalking and shallow staining usually justify cleaning. Deep pitting that weakens the frame is a repair or replacement issue, not a polishing issue.
The Bottom Line
Removing chalky oxidation from aluminum window frames is safest when the frame finish is identified first, the surface is washed, a small test patch is completed, and a mild cleaner is applied only briefly to bare aluminum. Use nylon rather than aggressive abrasives, rinse before chemicals dry, and seal clean metal afterward. Painted, anodized, deeply pitted, or repeatedly corroding frames need finish-specific restoration rather than stronger chemicals.