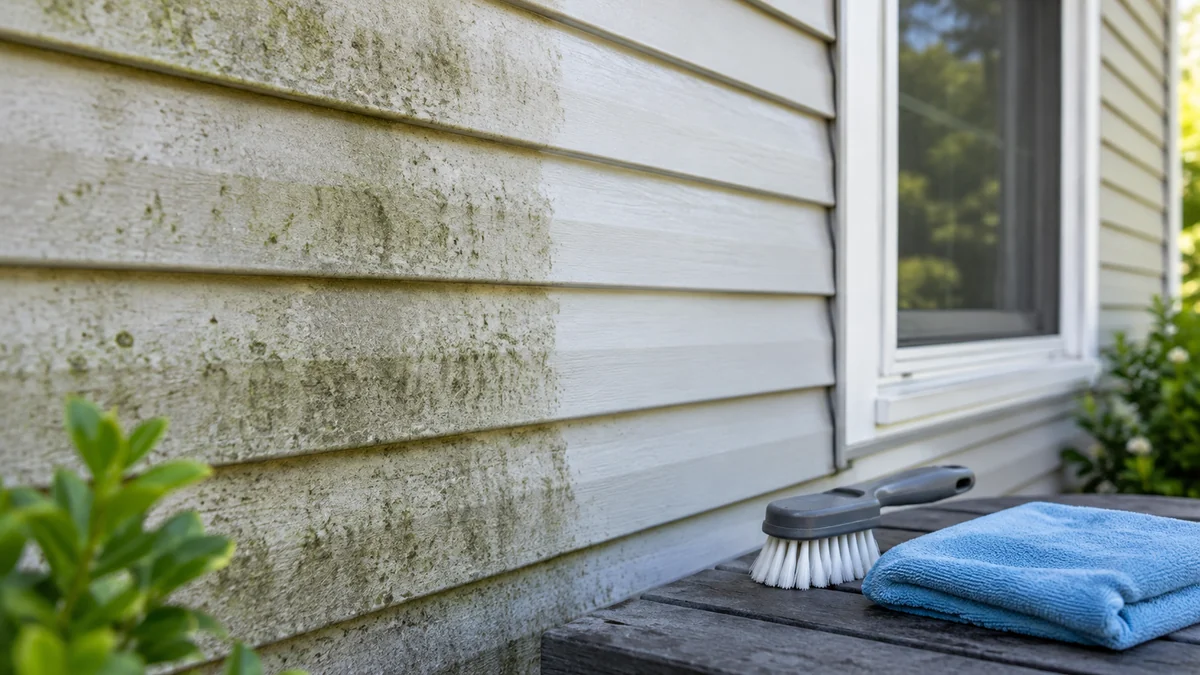
Heavy oxidation on vinyl siding is best treated with a siding-compatible oxidation remover, controlled dwell time, gentle agitation, and a low-pressure rinse. Bleach kills mildew but usually does not remove established chalking, while high-pressure washing can scar the finish or force water behind panels. Always test a small hidden area first.
Key Facts at a Glance
- Vinyl siding oxidation is a UV-aged, powdery surface layer created when sunlight and oxygen degrade PVC and pigments.
- A bleach house wash removes algae and mildew, but it is not a reliable treatment for heavy oxidation.
- Specialty oxidation removers should be mixed and applied exactly according to the product label.
- Work in shaded sections of approximately 10 feet wide, keeping the chemical wet during its dwell period.
- Use a soft brush only when chemical action leaves bonded chalk behind; abrasive pads and steel wool can permanently scratch vinyl.
- Persistent dullness after the powder is gone usually indicates pigment loss, not remaining dirt.
What Is Vinyl Siding Oxidation?
Vinyl siding oxidation is the breakdown of the siding’s exposed surface caused primarily by ultraviolet radiation, oxygen, heat, and weathering. The result is a dull, pale, powdery layer that transfers to a hand or cloth. The surface may look dirty, but the chalk is chemically altered vinyl rather than ordinary soil.
A simple test identifies the condition. Rub a dry, clean white cloth across the siding with moderate pressure. White or color-tinted powder indicates chalking. Green, black, or brown transfer points more toward algae, mildew, or dirt. A greasy film may indicate atmospheric pollution or nearby cooking exhaust.
Oxidation varies by exposure. South- and west-facing walls usually chalk sooner because they receive stronger afternoon sunlight. Dark blue, red, and green siding can show fading more clearly than white or beige siding, although every color can oxidize.
Oxidation Versus Other Surface Problems
| Surface condition | Transfer on white cloth | Typical appearance | Suitable first treatment |
|---|---|---|---|
| Heavy oxidation | White or siding-colored powder | Dull, faded, chalky | Labeled oxidation remover |
| Mildew | Green, gray, or black residue | Speckles or organic film | Labeled mildew cleaner |
| Dirt | Tan or gray residue | Even surface grime | Mild detergent wash |
| Efflorescence | White crystalline residue | Concentrated near masonry | Identify moisture source |
| Paint failure | Flakes or colored chips | Uneven coating loss | Paint assessment or replacement |
The distinction matters because the wrong chemical can waste time or create damage. A chlorine solution may brighten mildew while leaving the oxidized surface unchanged.
Why Oxidation Cannot Be Washed Away Like Dirt
Oxidation cannot be removed reliably through ordinary rinsing because the chalky layer is attached to weathered PVC and pigment. Water can carry away loose powder, but bonded residue requires a compatible chemical cleaner and controlled physical action.
Vinyl siding is manufactured with a relatively smooth weather-resistant surface. Abrasive cleaning removes more than chalk. Steel wool, scouring pads, abrasive powders, and aggressive melamine products can create fine scratches that trap dirt and change the panel’s sheen.
Chemical strength alone does not determine safety. Contact time, siding temperature, dilution, runoff, and rinsing technique all affect the result. A strong cleaner left on hot siding can produce more visible damage than a weaker cleaner used patiently in shade.
A practical rule is to increase dwell time and gentle agitation before increasing chemical concentration. Do not assume that a stronger mix is a safer shortcut.
Before You Start: Tools, Safety, and Conditions
A typical single-story DIY project requires 4-8 hours, depending on access, oxidation severity, and rinsing speed. The work becomes substantially more hazardous on a second story because the operator must control chemicals, hoses, ladders, and wet footing at the same time.
Before-Start Checklist
| Requirement | Typical specification | Why it matters |
|---|---|---|
| Work area | 8-12 feet wide | Prevents chemical drying |
| Weather | Shade, low wind, 50-85°F | Reduces evaporation and drift |
| Water supply | Garden hose with adjustable nozzle | Provides broad, low-impact rinsing |
| Sprayer | Chemical-resistant pump sprayer | Controls application rate |
| Brush | Soft nylon or vehicle-wash brush | Breaks residue without abrasive scratching |
| Protective equipment | Gloves, eye protection, long sleeves | Limits chemical contact |
| Test panel | 1-2 square feet in shade | Reveals discoloration or finish change |
Cover or move outdoor furniture, close windows, and protect nearby metal fixtures. Pre-wet plants and landscaping with clean water, then rinse them again after each section. Follow the cleaner’s safety data sheet and label, especially when the product contains acids, caustics, solvents, or oxidizers.
Never mix bleach with acids, ammonia, or unknown cleaners. Use one chemical system at a time, rinse thoroughly, and store products in their original labeled containers.
How Do You Clean Heavy Oxidation off Vinyl Siding?
Clean heavy oxidation from vinyl siding in six controlled stages: test and prepare, remove organic growth, pre-wet the siding, apply a labeled oxidation remover, allow controlled dwell with limited soft brushing, and rinse at low pressure. The most important success factor is preventing the chemical from drying on the panel.
Step 1: Test the Siding and Establish a Small Work Area
Test a hidden panel before cleaning the whole wall. Apply the proposed product at the label dilution, wait the stated dwell time, rinse completely, and let the panel dry. Compare the test area with the surrounding siding in natural light.
Look for color change, gloss change, streaking, swelling, loosened edges, and remaining chalk. If the panel looks blotchy after drying, do not continue with the same method. Contact the siding manufacturer or choose a less aggressive product.
Mark a manageable section, generally 8-12 feet wide and one story high. Remove fragile decorations and check that hose water will not enter open seams, vents, or damaged utility penetrations.
You will know the step worked when: the test panel dries evenly and the cloth transfer decreases without a visible change in color or gloss.
Common mistake: testing only while the siding is wet. Water temporarily masks uneven color and surface sheen.
Step 2: Remove Mildew, Algae, and Loose Dirt First
Treat organic growth before oxidation removal because mildew and algae can shield the chalked surface. Use a siding-compatible house-wash product or diluted bleach solution only when the product label permits it and surrounding materials can tolerate the runoff.
The frequently repeated mixture of one quart of bleach per gallon of water is not a universal safe formula. Bleach strength varies, and household bleach may contain additives. Follow the label, protect plants, and never combine the solution with an acidic oxidation remover.
Apply the organic cleaner to a cool, wet section. Allow the stated contact time, keep the surface wet, then rinse fully. Inspect the wall after rinsing. If black or green growth remains, repeat the organic treatment rather than increasing the oxidation-remover strength.
You will know the step worked when: visible biological growth is gone and the remaining white film transfers as powder during the wipe test.
Common mistake: applying an oxidation remover over active mildew and assuming one product will perform both jobs.
Step 3: Pre-Wet the Siding and Surrounding Materials
Pre-wet the siding from the ground upward with clean water, then wet adjacent plants, soil, glass, and painted surfaces. Pre-wetting lowers surface temperature and reduces uneven absorption into dry, weathered areas.
Avoid saturating wall cavities. Keep the hose stream broad and directed downward across the laps. Do not aim upward beneath the lower edge of overlapping panels.
Work only as fast as you can rinse. On a sunny wall, divide the section into smaller areas. A shaded, overcast morning is preferable, but humidity and wind still affect drying speed.
You will know the step worked when: the panel has an even water film and no area begins drying before cleaner application.
Common mistake: wetting the siding, then pausing for several minutes while preparing the sprayer. Re-wet the surface immediately before chemical application.
Step 4: Apply a Siding-Compatible Oxidation Remover
Apply a product specifically labeled for oxidation, chalking, or weathered vinyl. Start at the bottom of the section and work upward so descending runs do not cross dry siding and create narrow clean streaks.
Use the product’s stated dilution. Commercial products may call for different ratios depending on oxidation severity, but a generic ratio such as 1:4 cannot safely be applied to every formula. Measure concentrate and water accurately rather than estimating from the color of the solution.
A pump sprayer provides controlled coverage for a small project. A downstream injector can be useful for a professional crew, but the final concentration at the siding must be known. Do not allow the product to contact aluminum, bare metal, glass, asphalt, or painted surfaces unless the label approves those materials.
You will know the step worked when: the chalk begins to soften or suspend without rapid discoloration, bubbling, or a sharp change in gloss.
Common mistake: increasing concentration immediately when the first application appears slow. Increase dwell within the label limit or use gentle brushing before changing the mix.
Step 5: Maintain Dwell and Agitate Only When Necessary
Let the oxidation remover dwell for the label-specified period, often approximately 5-10 minutes for a small test section. Keep the surface visibly wet. If the cleaner starts to dry, mist with clean water or rinse the section and restart with a smaller area.
Heavy oxidation may require one light pass with a soft vehicle-wash or house-washing brush. Brush in the direction of the siding profile using minimal pressure. The brush should distribute the chemical and release softened chalk, not scrape the panel.
Avoid brushes with exposed metal, stiff natural fibers, or abrasive edges. Do not scrub dry siding. Dry brushing spreads chalk and can polish irregular patches into the surface.
You will know the step worked when: the brush moves smoothly, the chalk releases into the solution, and the siding retains an even appearance.
Common mistake: using stronger mechanical force because the brush is not removing dry residue. Dry residue usually means insufficient wetting or inadequate dwell.
Step 6: Rinse Thoroughly at Low Pressure
Rinse from the top downward with a broad garden-hose pattern or a properly controlled soft-wash system. Keep the nozzle several feet from the wall and direct water downward across the siding laps.
Pressure-washer specifications require caution. A machine may advertise 2,000 PSI at the pump, while a broad low-pressure application reaches the siding at much lower force. For DIY work, a garden hose is the safer default. If a pressure washer is used, select a wide fan, maintain distance, avoid concentrated tips, and test first.
Rinse until runoff is clear and no slippery cleaner remains. Pay attention to horizontal ledges, trim channels, window edges, and the bottom of each panel course.
You will know the step worked when: the dry panel has no chemical film, the surface feels clean rather than slick, and the white-cloth transfer is substantially reduced.
Common mistake: rinsing only until the visible foam disappears. Invisible residue can dry as streaks or continue reacting with the surface.
Which Cleaner Works Best for Oxidized Vinyl Siding?
A labeled vinyl oxidation remover is generally the best choice for heavy chalking because it targets weathered residue more directly than bleach, dish soap, or vinegar. Mild detergent remains useful for ordinary dirt, while oxygen-based cleaners may suit lighter oxidation and sensitive landscaping when the label permits vinyl use.
| Cleaning option | Heavy oxidation performance | Typical material cost | Main limitation |
|---|---|---|---|
| Vinyl oxidation remover | High when correctly matched | $20-$70 per gallon | Requires testing and careful runoff control |
| Mild siding detergent | Low | $10-$30 per gallon | Removes dirt, not bonded chalk |
| Sodium percarbonate | Low to moderate | $15-$25 per container | May need repeated applications |
| Diluted bleach cleaner | Low for chalk, high for mildew | $5-$20 per project | Does not normally restore faded pigment |
| Vinegar solution | Low | Under $10 per project | Inefficient for whole walls and may affect metals |
| High-pressure water | Unpredictable | Existing equipment cost | Can scar siding and drive water behind panels |
Product names and formulas change, so the label is more reliable than a generic internet dilution. Some professional products claim brushless results on severe oxidation, but even brushless products require a test panel and complete rinsing.
Can Vinegar or Dish Soap Remove Heavy Oxidation?
Vinegar and dish soap are suitable for small areas of ordinary film, but they are poor choices for heavy whole-wall oxidation. Dish soap can leave a residue that attracts soil, while vinegar may affect nearby metal, masonry, sealants, or plants.
These household products can help diagnose the problem. If mild washing removes the appearance and the cloth stops transferring powder, the issue was probably dirt. If chalking remains, use a product labeled for oxidized vinyl or stop before damaging the finish.
How Much Pressure Is Safe?
The safest pressure for most homeowners is a garden hose, not a concentrated pressure-washer jet. Vinyl siding manufacturer guidance varies by brand and condition, but concentrated high-pressure spray can lift seams, damage brittle panels, and force water behind the siding even when the visible surface appears intact.
| Equipment approach | Typical output or control | Suitable use | Risk level |
|---|---|---|---|
| Garden hose | Broad, low-impact stream | General rinsing | Lowest |
| Soft-wash rinse | Often under 500 PSI at application | Trained operators | Moderate |
| 25-degree pressure tip | Concentrated machine spray | Limited hard-surface work | High on vinyl |
| 15-degree pressure tip | Narrower concentrated spray | Not recommended for siding | Very high |
| Turbo nozzle | Rotating concentrated impact | Not suitable for vinyl | Extreme |
Keep spray away from panel bottoms, vents, window seals, electrical fixtures, and damaged areas. A clean appearance does not prove that water has not entered the wall assembly.
What If the Siding Looks Streaky After Cleaning?
Streaks usually result from dried cleaner, uneven application, incomplete rinsing, or a large section drying before the operator reaches it. Re-wet the affected area, work a smaller section, use the label’s lightest corrective dilution, and rinse more thoroughly.
Do not immediately apply a stronger solution. Stronger chemistry can make the contrast permanent if the underlying problem is pigment loss or uneven weathering.
Check the wall after full drying. Wet siding hides differences in gloss, and a wall may appear streaked while drying but become uniform later. If streaks remain, compare them with panel exposure, downspout paths, and previous cleaning lines.
What If the Siding Remains Dull After the Chalk Is Gone?
Persistent dullness after chalk removal usually means the siding has lost pigment or surface finish. Cleaning can remove residue, but it cannot rebuild PVC that ultraviolet exposure has degraded.
A useful checkpoint is the cloth test. If little powder transfers but the panel remains pale, cleaning has probably reached its practical limit. Painting with a vinyl-compatible exterior acrylic coating may improve appearance, but the coating must accommodate vinyl’s expansion and contraction and follow the paint manufacturer’s light-reflectance guidance.
Replacement is preferable when panels are brittle, warped, cracked, badly faded, or no longer match available replacement stock. Never use aggressive cleaning to force a color restoration that the material cannot provide.
Situational Variations
Dark or Deep-Colored Vinyl
Dark siding absorbs more solar heat and can dry chemical faster. Work in complete shade, use smaller sections, and inspect for gloss change from several angles. A cloudy day is helpful, but wind can still cause rapid evaporation.
Brittle or Older Siding
Older panels may crack around fasteners or become less flexible at low temperatures. Avoid ladders resting against the siding, concentrated spray, and forceful brushing. Replace a damaged test panel before cleaning the entire elevation.
Two-Story Homes
Do not climb a wet ladder while carrying a chemical sprayer and hose. Use ground-based equipment only when you can control the spray pattern, or hire a trained contractor with suitable access equipment.
Painted Vinyl Siding
Painted vinyl is not the same surface as factory-finished siding. Test for coating adhesion and follow the paint manufacturer’s cleaning restrictions. An oxidation remover intended for bare vinyl may soften or discolor the paint film.
Common Mistakes and How to Fix Them
| Mistake | What happens | Corrective action |
|---|---|---|
| Using a narrow pressure tip | Wand marks, lifted seams, surface scars | Stop, rinse, and inspect after drying |
| Cleaning in direct sun | Dried chemical runs and haze | Re-wet, work smaller shaded sections |
| Mixing bleach and acid | Dangerous gas or chemical reaction | Stop immediately, leave the area, ventilate safely |
| Scrubbing dry chalk | Scratches and uneven sheen | Rinse, re-wet, and use chemical dwell |
| Treating mildew as oxidation | Growth disappears but chalk remains | Use separate, compatible treatment stages |
| Skipping the test panel | Whole-wall discoloration | Stop before continuing; compare dry results |
One practitioner rule is especially useful: if a cleaner appears to work dramatically within seconds, treat that as a reason to inspect more closely, not proof that the product is superior. Rapid color change can indicate coating attack rather than safe oxidation removal.
How Much Does Oxidation Removal Cost?
Typical DIY costs range from $80-$200 for cleaner, sprayer, gloves, eye protection, brushes, and plant-protection materials. A professional service commonly costs approximately $400-$900 for an average home, with height, access, oxidation severity, landscaping, and regional labor rates creating large differences.
| Project type | Typical duration | Typical cost | Main cost driver |
|---|---|---|---|
| Small DIY test and front elevation | 2-4 hours | $40-$100 | Cleaner and access |
| Average single-story DIY project | 4-8 hours | $80-$200 | Chemical quantity and rinsing |
| Professional single-story service | 2-4 hours | $400-$700 | Labor and plant protection |
| Professional two-story service | 3-6 hours | $600-$1,200 | Access and safety equipment |
| Replacement of isolated panels | 1-3 hours | $150-$500 | Color match and panel availability |
Treat these as typical planning ranges rather than guaranteed quotes. A contractor who proposes only chlorine house washing for heavy chalking has not necessarily specified an oxidation-removal process.
When Should You Hire a Professional?
Hire a professional when the siding is two stories high, the wall is heavily oxidized over a large area, landscaping is dense, electrical equipment is nearby, or you cannot safely control chemical runoff. Professional work is also sensible when the siding is brittle or the correct product requires hazardous handling.
Ask the contractor four specific questions:
- Will you perform a test panel and show the dry result?
- Are you using an oxidation-specific product rather than only bleach?
- What pressure and spray pattern will contact the siding?
- How will you protect plants, windows, metal, and painted surfaces?
A low price is not useful if the contractor creates irreversible wand marks or leaves chemical residue. Written answers provide better evidence than the phrase “soft wash” alone.
How Can You Slow Future Chalking?
Future chalking cannot be eliminated because vinyl remains exposed to sunlight and oxygen, but gentle maintenance can reduce deposited dirt and organic growth. Rinse exposed elevations periodically, keep gutters from overflowing onto the wall, and remove mildew before it becomes a thick film.
Use a mild siding cleaner for routine washing rather than an oxidation remover every season. Inspect south- and west-facing walls annually, especially after hot summers. Early chalking is easier to manage because less pigment has been lost.
Do not apply waxes, silicone dressings, or unapproved solvent coatings to hide oxidation. Those products can interfere with later painting, attract dirt, or produce an uneven sheen.
FAQ
Can bleach restore the original color of oxidized vinyl siding?
Bleach can remove mildew, algae, and some organic staining, but bleach usually cannot restore pigment lost through UV oxidation. If a white cloth stops collecting chalk and the siding remains faded, additional bleach is unlikely to help and may damage plants, metals, or nearby finishes.
How long should oxidation remover stay on vinyl siding?
Many products specify approximately 5-10 minutes, but the label controls the correct dwell time. Keep the surface wet throughout the period and rinse immediately if the product begins drying, the siding changes color, or the test area reacts unexpectedly.
Should I clean vinyl siding before painting it?
Yes, but cleaning does not replace surface preparation. Remove dirt, mildew, chalk, and loose material, then allow the siding to dry fully. Test paint adhesion and use a vinyl-compatible exterior acrylic coating that accommodates panel movement and follows reflectance requirements.
Can oxidation be removed from vinyl siding in winter?
Cold weather slows chemical reaction and can make panels brittle, while freezing conditions create runoff and access hazards. Follow the product’s minimum application temperature, avoid frozen surfaces, and postpone the work when water may freeze before rinsing.
Why does one side of my house oxidize faster?
South- and west-facing elevations usually receive greater solar exposure, so heat and ultraviolet radiation can accelerate chalking. Nearby trees, reflected sunlight, roof runoff, and different panel batches can also create uneven aging across the same home.
Is it better to replace heavily oxidized siding than clean it?
Replace siding when panels are brittle, cracked, warped, deeply faded, or still visibly dull after chalk removal. Cleaning is preferable when the panels remain flexible and the problem is mainly removable surface oxidation rather than permanent pigment loss.
The Bottom Line
Cleaning heavy oxidation off vinyl siding without damage requires diagnosis before chemistry, a labeled oxidation remover, shaded section-by-section application, controlled dwell, minimal soft brushing, and a broad low-pressure rinse. Bleach is useful for mildew but is not a substitute for oxidation treatment. If the chalk is gone yet the siding remains faded, the material has likely lost pigment and needs compatible painting or replacement rather than more aggressive cleaning.