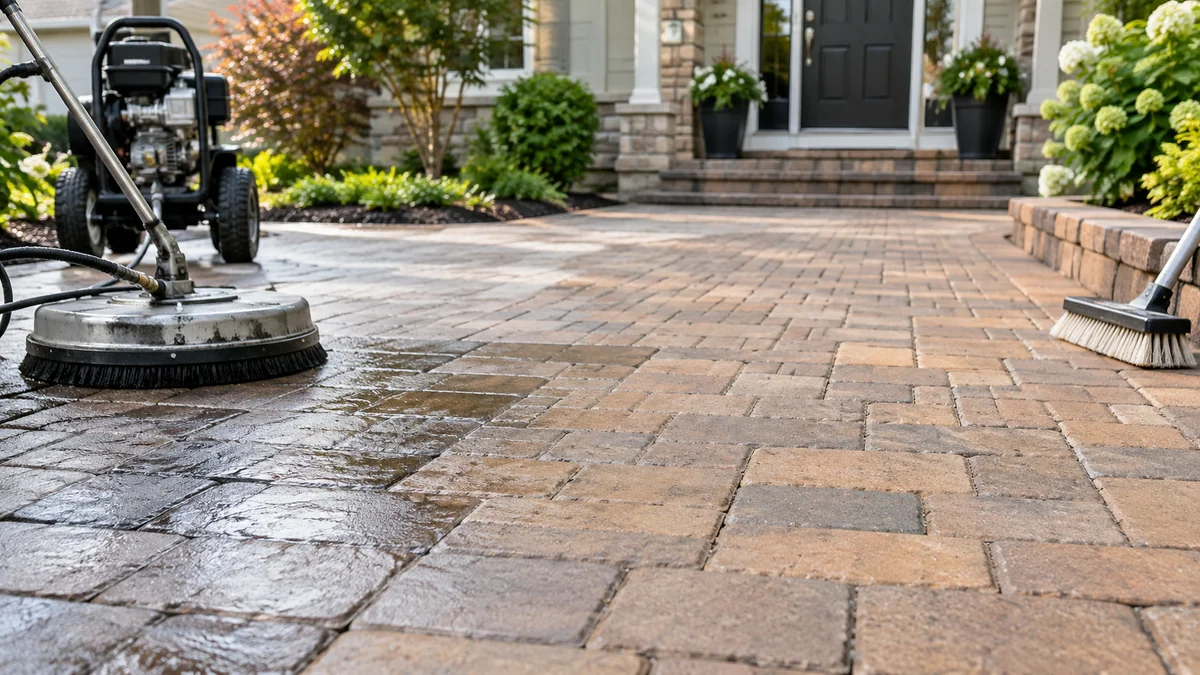
Wait at least 24-48 hours after pressure washing pavers before applying sealer, provided the weather is warm, dry, and well ventilated. Extend the wait to 48-72 hours or longer in shade, high humidity, cool temperatures, dense clay pavers, or saturated joint sand. Sealing before the pavers and joints are dry can cause whitening, peeling, bubbles, or premature failure.
Key Facts at a Glance
- Concrete pavers usually need 24-48 dry hours after pressure washing before sealing.
- Shaded, humid, cool, or poorly drained areas may need 48-72 hours or more.
- Rain, irrigation, heavy dew, or another wash can restart the drying period.
- Pavers can look dry while joint sand and bedding layers remain damp.
- A penetrating sealer tolerates vapor movement better than a film-forming wet-look sealer.
- New polymeric sand must be installed and cured according to its manufacturer’s instructions before sealing.
How Long Should Pavers Dry After Pressure Washing?
The standard drying period is 24-48 consecutive dry hours, but the correct interval depends on more than the clock. Concrete pavers in full sun with low humidity may be ready near the 24-hour mark, while shaded pavers over compacted bedding sand can remain damp after two full days.
Pressure washing introduces water into three locations: the paver surface, the capillary pores within the paver, and the joints beneath the paver edges. The joint material often dries more slowly than the exposed face because it receives less airflow and may hold water against the bedding layer.
Professional installers commonly use 48 hours as the safer default when the product label does not provide a different requirement. Solvent-based acrylics and other film-forming products deserve the longer interval because trapped moisture has fewer escape routes once the coating begins forming a continuous film.
What changes the drying time?
| Condition | Typical minimum wait | Reason |
|---|---|---|
| Full sun, 60-85°F, low humidity | 24 hours | Strong evaporation and airflow |
| Partial shade, 60-80°F | 36-48 hours | Slower joint and bedding drying |
| Humidity above 70% | 48-72 hours | Moisture leaves pores slowly |
| Overnight dew or fog | Add 12-24 hours | Surface re-wets after sunset |
| Cool weather below 55°F | 48-72 hours | Evaporation and curing slow down |
| Poor drainage or saturated joints | 72 hours or longer | Water remains below the pavers |
These figures are typical field-planning ranges, not substitutes for the sealer label. A product manufacturer may require a specific moisture threshold, temperature range, or longer rain-free period.
Can You Seal Pavers the Same Day?
Same-day sealing is usually a poor choice after pressure washing because visible surface dryness does not prove that the joints and bedding are dry. Same-day application is only reasonable when a manufacturer expressly permits it and the surface passes a moisture check, which is uncommon for recently saturated pavers.
A warm breeze can dry the top face in a few hours. The sand beneath the chamfered edges can remain wet, however, especially where the surface is shaded by a wall, vehicle, fence, or building. A sealer applied over that moisture may trap vapor and produce a milky or cloudy appearance.
The risk is highest with a solvent-based, high-gloss sealer. The coating can skin over while water vapor moves upward, creating blushing, bubbles, adhesion loss, or patchy color enhancement. A breathable penetrating sealer is more forgiving, but it still requires a dry substrate if the label specifies one.
What happens when pavers are sealed too soon?
| Failure | Visible symptom | Main cause | Likely remedy |
|---|---|---|---|
| Blushing | White or milky film | Moisture trapped under coating | Product-specific re-emulsification or stripping |
| Peeling | Sheets or flakes detach | Weak adhesion over damp surface | Remove failed coating and allow full drying |
| Bubbles | Small raised blisters | Vapor or air escaping | Sand, strip, or recoat only after diagnosis |
| Dark patches | Uneven wet appearance | Uneven absorption | Allow curing, then assess before recoating |
| Sticky surface | Tacky coating after curing | Excess product, cool weather, or moisture | Follow label cleanup or stripping procedure |
Do not automatically spray xylene or another solvent over cloudy sealer. Solvent treatment can worsen damage, create fumes, or dissolve adjacent coatings. Use the product technical data sheet first.
How Can You Tell Whether Pavers Are Dry Enough?
A paver surface is ready for sealing when the pavers, joints, and accessible edges show no dampness, darkening, cool moisture, or condensation, and a covered moisture test remains dry. The most practical test is to tape clear plastic over several representative areas for several hours.
Use a plastic-sheet test
- Select one sunny area, one shaded area, and one location where joints stay damp.
- Tape a clear 18-by-18-inch plastic sheet tightly over the pavers.
- Leave it in place for 4-6 hours, preferably during the warmest part of the day.
- Inspect the underside of the plastic and the covered pavers.
- Delay sealing if you see condensation, darkening, or a damp outline.
The test is not a laboratory moisture measurement, but it detects meaningful vapor release. Perform it on joints as well as on the paver face. A dry center with wet joint lines means the installation is not ready.
A second field check is visual comparison. Dry concrete pavers usually return to their normal color uniformly. Dark lines around joints, cool-feeling shaded sections, or isolated dark rectangles indicate uneven moisture. Do not judge readiness from the sunniest section alone.
Why do joints dry more slowly than pavers?
Joint sand dries slowly because it sits below the paver surface, has limited airflow, and can receive water from neighboring joints. Fine sand also retains moisture through small capillaries, while compacted bedding sand can hold water beneath the installation.
This is why pressure washing and sealing should be treated as a sequence rather than two unrelated services. If washing removes joint sand, the surface may need fresh sand after drying. New sand introduces another moisture and curing variable.
Should You Sand Pavers Before or After Sealing?
Replace or replenish joint sand after pressure washing and before sealing, once the pavers and joints are dry. Polymeric sand should be installed according to its label, compacted into the joints, cleaned completely from the surface, and allowed to cure for the manufacturer’s stated period.
A practical sequence is:
- Pressure wash and rinse the pavers.
- Wait until the installation is fully dry.
- Inspect joint depth and remove debris.
- Sweep dry joint sand into the gaps.
- Compact or vibrate the sand where the product requires it.
- Leave the sand approximately 1/8 inch below the paver chamfer, unless the product label specifies another depth.
- Blow every loose grain from the paver faces.
- Apply sealer only after the sand and pavers meet the product’s moisture and cure requirements.
Polymeric sand residue left on the face can bond permanently when sealer is applied. Excess sand can also create a rough, cloudy, or speckled appearance that resembles sealer failure.
Polymeric sand and regular joint sand are different
| Material | Typical use | Cure consideration | Sealing implication |
|---|---|---|---|
| Kiln-dried joint sand | Basic residential joints | Dries through evaporation | Does not chemically harden |
| Polymeric sand | Stabilized joints | Often needs 24-72 hours dry | May require sealer compatibility |
| Coarse bedding sand | Beneath pavers | Can retain hidden water | Affects total drying time |
| Fine masonry sand | Filling narrow gaps | Can hold surface residue | May migrate under washing |
Never assume that sealing stabilizes every type of sand. Penetrating sealers generally do not glue joint particles together, while some joint-stabilizing products are designed specifically to bind sand.
Which Paver Sealer Is Best After Pressure Washing?
The best sealer depends on the desired appearance, moisture risk, traffic, and whether joint stabilization matters. A penetrating sealer is the safest choice for breathability and natural appearance, while a film-forming acrylic is better for color enhancement but demands stricter drying and application control.
| Sealer type | Typical appearance | Moisture tolerance | Typical service life | Main limitation |
|---|---|---|---|---|
| Silane-siloxane penetrating | Natural matte | High | 3-5 years | Does not create wet look |
| Water-based acrylic | Matte to satin | Moderate | 2-4 years | Less color depth |
| Solvent-based acrylic | Satin to glossy | Low | 2-4 years | Blushing and odor risk |
| Joint-stabilizing sealer | Matte to satin | Moderate | 2-3 years | Requires clean, dry sand |
| Polyurethane coating | Glossy film | Low to moderate | 3-6 years | Difficult removal and repair |
These are typical ranges. Sun exposure, abrasion, salt, freeze-thaw cycles, product solids, and maintenance can shorten or extend service life.
Penetrating sealer
A penetrating silane-siloxane or similar product enters the paver rather than leaving a thick visible film. It suits driveways, walkways, and freeze-thaw environments where water repellency matters more than color enhancement.
Penetrating products are not ideal when the goal is a glossy wet look or strong joint-sand binding. They also cannot hide oil stains, uneven paver color, or poor cleaning.
Water-based acrylic sealer
Water-based acrylics usually produce lower odor and easier cleanup than solvent-based products. They may be a practical option for occupied homes, enclosed courtyards, or areas where ventilation is limited.
Water-based does not mean moisture-proof. Applying the product over damp pavers can still create whitening, adhesion problems, or uneven appearance.
Solvent-based acrylic sealer
Solvent-based acrylics commonly provide stronger color enhancement and a deeper wet-look finish. They require strict control of moisture, surface temperature, ventilation, coverage, and puddling.
Solvent-based coatings are a poor choice for an installer who cannot verify dryness or remove excess product quickly. The dramatic appearance comes with a narrower application window.
What Weather Is Suitable for Sealing Pavers?
Seal pavers during a dry weather window with moderate temperatures, low wind, and no rain or heavy dew expected during application and early curing. A typical workable range is 60-85°F, but the product label controls because formulations vary.
Avoid sealing when:
- Rain is forecast during the application or cure period.
- Surface temperature exceeds the product limit.
- Pavers remain cold and damp after overnight shade.
- Wind can blow dust, leaves, or overspray onto the coating.
- Heavy dew is expected before the product becomes touch-dry.
- Irrigation or sprinklers can wet the area.
Rain does not always require a completely new 48-hour wait if it occurs after a properly cured coating has formed, but rain during drying or early cure can spot, cloud, or wash away the product. If rain wets freshly washed pavers before sealing, restart the drying assessment rather than relying on the previous elapsed time.
How Do You Apply Sealer After the Drying Period?
Apply paver sealer in thin, even coats on a clean, dry surface, maintaining the manufacturer’s coverage rate and preventing puddles in low joints. The most important application controls are surface temperature, product quantity, overlap, ventilation, and removal of excess material.
Step 1: Inspect the cleaned surface
Remove leaves, dust, efflorescence residue, loose sand, and organic growth. A sealer does not correct stains or hide residue; it can make those defects more difficult to remove.
Success checkpoint: the pavers have consistent color and no visible standing water.
Common mistake: sealing immediately after pressure washing because the face looks clean.
Step 2: Confirm dryness
Use the plastic-sheet test across sunny, shaded, and joint-heavy areas. Delay the work if condensation or darkening appears.
Success checkpoint: the covered area remains visually dry.
Common mistake: testing only the warmest portion of the patio.
Step 3: Prepare the joints
Add compatible dry sand where washing removed material. Compact it as required and clear all residue from the paver faces.
Success checkpoint: joints are filled evenly and loose grains do not remain on top.
Common mistake: leaving sand above the chamfer, where sealer bonds it to the surface.
Step 4: Apply a test patch
Use a small, inconspicuous section to check color change, absorption, gloss, and slip characteristics. Let the test cure before committing to the whole installation.
Success checkpoint: the test patch matches the intended appearance after drying.
Common mistake: assuming the wet application color equals the final cured color.
Step 5: Apply the first coat
Use a solvent-resistant pump sprayer, microfiber applicator, or roller approved by the product manufacturer. Spread the sealer evenly and back-roll excess from puddles or low spots.
Success checkpoint: no glossy pools, lap marks, or untreated bands remain.
Common mistake: applying extra product to make porous pavers look darker.
Step 6: Apply additional coats only when allowed
Follow the label’s recoat window. Some products require a second coat while the first remains receptive; others require complete drying first.
Success checkpoint: the surface accepts the next coat without dragging or becoming gummy.
Common mistake: adding a second coat because the first appears uneven before it has cured.
How Much Does Paver Sealing Cost?
Typical DIY material costs range from $40-$90 per gallon, while professional cleaning, sanding, and sealing commonly range from $1.50-$3.50 per square foot. Actual coverage varies substantially because porous pavers and first coats consume more product.
| Project type | Typical material or service cost | Typical coverage or scope | Main price variable |
|---|---|---|---|
| DIY penetrating sealer | $40-$90 per gallon | 100-250 sq. ft. | Paver porosity |
| DIY acrylic sealer | $45-$100 per gallon | 75-200 sq. ft. | Number of coats |
| DIY polymeric sand | $25-$60 per bag | 30-100 sq. ft. | Joint width and depth |
| Professional service | $1.50-$3.50 per sq. ft. | Wash, sand, seal | Repairs and access |
| Sealer removal | $2-$6 per sq. ft. | Existing coating removal | Coating thickness |
A first coat on old, porous concrete pavers may cover less area than the label’s maximum estimate. Measure the actual project, calculate the product requirement, and retain enough material for consistent coverage across the final section.
What Are the Most Common Sealing Mistakes?
The most damaging mistakes are sealing damp joints, overapplying product, ignoring residue, and choosing a coating that conflicts with an existing sealer. Correcting the cause matters more than adding another coat.
- Sealing after only a few sunny hours: moisture remains below the face. Wait through the full drying period and test shaded areas.
- Applying over efflorescence: white salts can remain active beneath the coating. Remove deposits with a compatible cleaner, rinse thoroughly, and dry again.
- Puddling in low areas: thick films cure slowly and may peel. Spread excess material immediately.
- Using solvent sealer without ventilation: fumes can accumulate near walls and enclosed courtyards. Follow the safety data sheet.
- Coating unknown old sealer: incompatible chemistry can wrinkle, soften, or delaminate. Test adhesion and compatibility first.
- Allowing traffic too early: footprints and tire marks can become permanent. Block access for the full cure period.
A practical installer rule is simple: if the surface looks questionable, postpone the coating rather than gambling on a repair. Drying costs a day; stripping a failed film can cost several times the original application.
When Can You Walk or Drive on Sealed Pavers?
Light foot traffic is commonly allowed after 2-4 hours, but vehicle traffic usually requires 48-72 hours. Cool temperatures, high humidity, thick application, shade, and solvent-based products can extend those times.
Keep furniture, toys, grills, planters, and vehicles off the surface until the product label permits them. A coating that feels dry can still be soft below the surface, particularly where product accumulated in joints or textured depressions.
For driveways, leave the area blocked overnight at minimum and use the longer vehicle interval when temperatures fall below the label’s preferred range. Turning tires while stationary places more shear force on the coating than straight-line driving.
How Do You Fix Cloudy or Peeling Paver Sealer?
Cloudy sealer requires identifying whether the problem is trapped moisture, excess product, efflorescence, or incompatible coating before attempting repair. Light haze may respond to the manufacturer’s approved solvent or re-emulsification method, while peeling usually requires mechanical or chemical removal and complete drying.
Do not apply a fresh coat over peeling or delaminated material. Scrape or strip the failed areas according to the product’s technical instructions, remove residue, allow the pavers to dry, and test a small section before restoration.
For severe failure, professional coating removal is often safer than improvised solvent use. Xylene, acetone, and commercial strippers can damage adjacent surfaces, create hazardous vapors, and spread softened resin across otherwise clean pavers.
Situational Recommendations
Pool decks
Wait at least 48 hours after washing, confirm dryness around coping and drainage edges, and select a product with suitable slip characteristics. A high-gloss film can become slick when wet, so a natural-look penetrating product or compatible anti-slip additive is often safer.
Driveways
Use a sealer rated for vehicle traffic and wait 48-72 hours before driving. Penetrating products avoid tire pickup and peeling risks associated with thick films, although they provide less color enhancement.
Clay brick pavers
Clay masonry can absorb water differently from concrete. Use a breathable product approved for brick, test for darkening, and expect the drying period to exceed 48 hours in shaded or humid conditions.
Natural stone pavers
Travertine, limestone, slate, and other stones require material-specific products. Acid cleaners, strong pressure, and incompatible acrylics can etch or discolor the stone, so follow the stone and sealer manufacturer’s instructions.
FAQ
Can I seal pavers 12 hours after pressure washing?
Usually, no. Twelve hours may be enough only in exceptional conditions with intense sun, low humidity, strong airflow, and a product that explicitly permits the interval. Check the joints and use a plastic-sheet test before considering early application.
Does sealing pavers prevent weeds permanently?
No. Sealing can reduce sand erosion and make weed removal easier, but it does not permanently prevent seeds from germinating in windblown debris or organic material. Proper joint filling, drainage, and periodic maintenance remain necessary.
Can I seal pavers if the forecast has 10% rain?
A low rain probability still creates risk if the surface is not fully cured. Follow the product’s rain-free requirement, commonly several hours or longer, and avoid sealing when storms, dew, or irrigation could wet the coating.
How long should I wait after adding polymeric sand?
Follow the polymeric-sand label, with 24-72 dry hours being a common planning range. The sand must be properly activated or compacted as directed, and the joints must cure before a compatible sealer is applied.
Can old sealed pavers be pressure washed and resealed?
Yes, if the existing coating is sound, compatible, and thoroughly cleaned. Peeling, chalking, cloudy, or unknown coatings should be tested and often removed before resealing because a new layer cannot reliably restore weak adhesion.
Is sealing pavers worth it?
Sealing is worthwhile when stain resistance, color enhancement, water repellency, or joint stabilization justifies maintenance and future recoating. It is less suitable when the owner wants zero upkeep, a completely natural appearance, or a surface that can tolerate poor drainage without coating failure.
The Bottom Line
For most installations, wait 48 dry hours after pressure washing before sealing pavers, then verify dryness in the joints and shaded areas rather than relying on elapsed time alone. Extend the interval to 72 hours in cool, humid, shaded, or poorly drained conditions, replenish compatible joint sand, and choose a sealer whose moisture tolerance and appearance match the project. The safest answer to how long to wait to seal pavers after pressure washing is the longer interval that produces a demonstrably dry substrate.