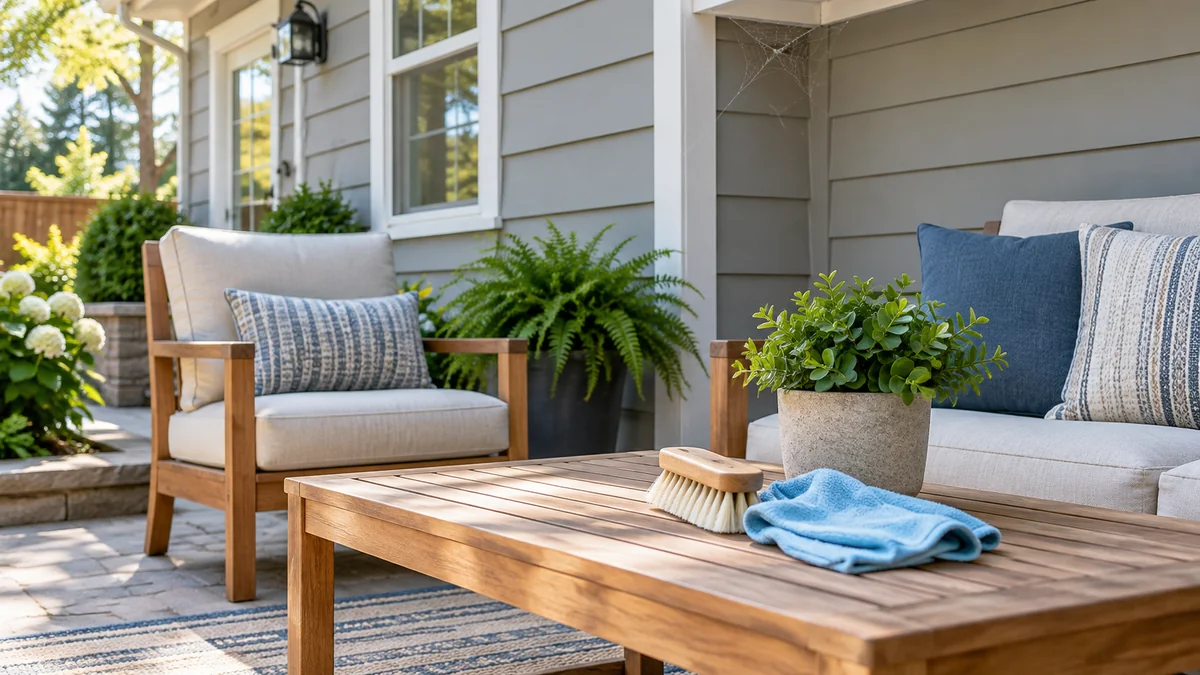
To keep spiders and bugs away after exterior cleaning, let the house dry completely, seal entry gaps, reduce insect-attracting light, manage vegetation and moisture, then apply any pesticide strictly according to its label. The most effective sequence combines exclusion and habitat changes with targeted residual treatment, rather than relying on a broad spray alone.
Key Facts at a Glance
Exterior washing removes webs and insect debris, but it does not provide lasting pest control.
A typical exterior surface needs 24-48 hours to dry before a residual product is applied.
Spiders return when flying insects, sheltered corners, outdoor lighting, and vegetation remain available.
Caulk, screens, weatherstripping, and sealed utility penetrations provide longer-lasting protection than repellents.
Botanical oils usually need reapplication every 7-14 days outdoors because sunlight and rain reduce their residue.
Pesticides must be used only on the surfaces, pests, rates, and conditions allowed by the product label.
Why Do Pests Return After Exterior Washing?
Spiders and insects return after exterior washing because cleaning removes visible webs and residue without removing the conditions that support recolonization. Eaves, porch ceilings, window corners, dense shrubs, foundation cracks, and lights still offer shelter or attract prey.
House washing can remove algae, mold, fly spots, dead insects, and pheromone trails. That improves the surface, but the result is temporary from a pest-control perspective. Flying insects may arrive the same evening if porch lights remain bright, while spiders can rebuild webs in protected corners within days.
Spiders are predators, so a spider problem often indicates an insect-attraction problem. Removing spiders without reducing moths, gnats, mosquitoes, or other prey usually produces a short-lived result.
The cleaning process also exposes defects. Water may reveal failed caulk, open soffit joints, loose screens, and gaps around pipes or cables. Those openings deserve attention before any chemical treatment.
What Does Exterior Cleaning Actually Control?
Exterior cleaning controls visible contamination and some exposed pests, but it does not reliably eliminate eggs, insects inside wall voids, or pests protected under siding and roof components. Pressure washing may dislodge webs and insects; soft washing can remove organic growth more gently, but neither method creates a lasting barrier.
Cleaning also cannot correct drainage, lighting, or landscaping conditions. A downspout that keeps the foundation damp can sustain insects after the wall dries. Irrigation aimed at siding can shorten the life of a treatment and create a recurring moisture zone.
What Should You Do Immediately After Washing?
The correct sequence is to finish all cleaning first, allow the structure to dry, inspect and seal defects, modify pest-attracting conditions, and apply a targeted product only if needed. A typical homeowner can complete the inspection and prevention work in 2-4 hours, excluding drying time.
Before You Start
| Item | Typical requirement | Why it matters |
|---|---|---|
| Drying time | 24-48 hours | Prevents dilution and poor adhesion |
| Inspection time | 30-60 minutes | Finds gaps and damp zones |
| Caulk | 1-3 tubes | Seals siding, trim, and utility gaps |
| Screen material | 1-5 feet | Covers vents and larger openings |
| Gloves and eye protection | 1 set | Reduces exposure during repairs |
| Residual product | 1 ready-to-use container or labeled concentrate | Treats approved exterior zones |
| Total DIY materials | $25-$150 typical | Depends on product and repairs |
Weather changes the schedule. Warm, dry, low-humidity conditions may allow drying in one day; shaded masonry, humid weather, or recent rain may require longer. The product label controls the minimum drying and application requirements.
Step 1: Confirm That the Exterior Is Dry
Do not apply a residual insecticide or repellent to damp siding, trim, glass, or masonry. Wait at least 24 hours after washing, then check shaded areas, soffit joints, window ledges, and the foundation because those locations dry last.
Press a clean, dry paper towel against a shaded surface for 10 seconds. Moisture transfer means the surface is not ready. A cool surface is not necessarily wet, but visible sheen, droplets, darkened porous masonry, or a damp towel requires more drying time.
Plan around rain. A typical outdoor treatment needs several hours without rain after application, but the pesticide label provides the binding requirement. Do not spray when runoff could enter storm drains, ponds, streams, vegetable gardens, or flowering plants.
Success checkpoint: The paper towel remains dry, and the label allows application under the current temperature and weather conditions.
Common mistake: Treating immediately after washing because the siding looks clean. Clean appearance does not prove chemical readiness.
Step 2: Seal Structural Gaps and Repair Screens
Seal openings before spraying because exclusion blocks entry permanently, while a residual barrier degrades outdoors. Focus on joints and penetrations, not random cracks that are part of intentional drainage or ventilation.
Inspect these locations:
- Gaps around hose bibs, electrical conduits, cable lines, and gas pipes.
- Failed caulk at window trim, door frames, siding transitions, and corner posts.
- Torn window screens, loose door sweeps, and garage-door side seals.
- Open soffit returns, damaged fascia, attic vents, and foundation penetrations.
- Cracks wider than approximately 1/8 inch around nonstructural trim.
Use exterior-grade silicone or polyurethane caulk where the material is compatible. Do not seal weep holes in brick veneer, soffit ventilation openings, foundation drainage points, or screened vents that must remain open. Cover larger openings with corrosion-resistant mesh, then secure the repair according to the component design.
Success checkpoint: No daylight is visible around service penetrations, screens fit tightly, and intentional drainage openings remain unobstructed.
Common mistake: Filling every opening with caulk. Blocking drainage can trap water and create a more serious moisture problem.
Step 3: Apply a Targeted Residual Barrier
Apply a residual product only to label-approved surfaces and pest targets. A practical treatment band often includes eaves, soffit joints, porch ceilings, door and window frames, garage thresholds, and the lower foundation, but the permitted pattern varies by formulation.
Use a narrow, controlled application rather than saturating the entire facade. Avoid glass, food-growing areas, toys, pet dishes, fish ponds, flowering plants, and surfaces where people or animals regularly touch unless the label specifically permits treatment.
A handheld pump sprayer can deliver a controlled band at ground level. Long-range products may reach higher eaves, but distance does not remove the need to avoid drift. Wear the protective equipment listed on the label, keep children and pets away during application, and observe the stated reentry period.
| Treatment type | Typical outdoor persistence | Typical DIY cost | Best use |
|---|---|---|---|
| Microencapsulated pyrethroid | 30-90 days | $35-$60 per mixed gallon | Heavy insect pressure on approved surfaces |
| Ready-to-use spider repellent | 30 days to several months | $15-$45 per container | Sheltered eaves and porch zones |
| Essential-oil formulation | 7-14 days | $10-$25 per batch or bottle | Short-term, low-pressure prevention |
| Caulk and mesh exclusion | Several years to permanent | $15-$75 in materials | Entry points and structural gaps |
| Professional perimeter treatment | 30-90 days per visit | $100-$300 per visit | Large, complex, or recurring infestations |
The table shows typical ranges, not guarantees. Rain, ultraviolet exposure, washing, porous materials, irrigation, pest pressure, and product chemistry change the result.
Success checkpoint: The treated band is narrow, uniform, and free of visible puddling or drift.
Common mistake: Spraying broad fan mist across windows and siding. Overspray can leave residue, waste product, and increase exposure without improving control.
Step 4: Reduce Outdoor Lighting That Attracts Insects
Change exterior lighting because many spiders gather where lights concentrate flying prey. Warm-colored LED bulbs around 2,200-3,000 Kelvin generally attract fewer insects than bright, cool-white lighting, although no bulb eliminates attraction completely.
Use shielded fixtures that direct light downward, motion sensors that shorten operating time, and curtains or blinds that reduce indoor light escaping through windows. Turn off decorative lights when they are unnecessary. Keep essential security lighting, but move fixtures away from doors and walls when the design allows.
White LEDs and incandescent bulbs can create a concentrated insect zone at an entryway. A warmer, shielded fixture reduces that concentration but will not solve a nearby wet landscape, dense vegetation, or a large breeding source.
Success checkpoint: The entryway is illuminated for safe movement, but light does not shine directly across siding, eaves, or shrubbery.
Common mistake: Replacing a bulb while leaving the fixture unshielded and operating all night.
Step 5: Separate Vegetation, Moisture, and Mulch From the Wall
Prune branches, shrubs, ornamental grasses, and vines so foliage sits approximately 12-18 inches from siding and foundation walls. This gap reduces bridging routes, improves airflow, and makes inspection easier.
Move irrigation heads so they do not spray siding, windows, doors, or foundation joints. Repair leaking hose connections and downspouts. Keep mulch from covering siding, weep holes, vents, or the lowest wall components; excessive organic material near the foundation can shelter insects and retain moisture.
| Site condition | Typical corrective target | Pest-control effect |
|---|---|---|
| Shrubs against siding | 12-18 inch clearance | Removes bridges and shaded harborages |
| Sprinkler overspray | Zero spray on walls | Reduces damp surfaces |
| Porch light operation | Motion control or fewer hours | Reduces flying-insect buildup |
| Downspout discharge | At least 4-6 feet from foundation | Limits persistent foundation moisture |
| Door sweep gap | Less than 1/4 inch | Reduces crawling entry routes |
| Window-screen opening | No visible gap | Blocks flying and crawling insects |
Success checkpoint: You can walk the perimeter, see the lower wall, and inspect the foundation without moving branches or mulch.
Common mistake: Trimming plants but leaving a leaking downspout. Moisture can sustain the same pest pressure after landscaping looks tidy.
Which Prevention Method Works Best?
Exclusion is the best long-term foundation, targeted residual treatment is the strongest option for active pressure, and lighting or botanical changes work best as supporting measures. No single method reliably prevents every spider or insect on an exposed exterior.
| Option | Strength | Limitation | Typical service interval |
|---|---|---|---|
| Physical exclusion | Blocks access to interiors | Does not stop insects landing outdoors | Inspect twice yearly |
| Synthetic residual | Fast, broad control on labeled surfaces | Runoff, drift, and non-target risks | 30-90 days |
| Specialized repellent | Convenient for sheltered web zones | Performance varies by surface and weather | 1-12 months, label dependent |
| Botanical product | Lower-persistence alternative | Rain and sunlight shorten effect | 7-14 days |
| Lighting and landscaping | Reduces pest attraction | Cannot remove an established source | Ongoing maintenance |
When Are Synthetic Residuals Appropriate?
Synthetic residuals are appropriate when insect pressure is substantial, the target pest is identified, and the product label authorizes the intended exterior surface. Common active ingredients include bifenthrin, cyfluthrin, deltamethrin, and related pyrethroids, but active ingredient names do not replace label instructions.
These products can reduce insects that contact treated surfaces, which may indirectly reduce spider prey. They are not a substitute for sealing gaps, and they do not guarantee that spiders will avoid an untreated roofline or adjacent vegetation.
Avoid spraying flowering plants, water, drains, edible crops, and areas frequented by pollinators. Never increase the concentration or application frequency beyond the label. If the infestation involves stinging insects inside a wall, termites, bed bugs, or a medically significant spider, use a licensed pest professional.
Are Botanical Sprays Effective?
Botanical sprays can provide short-term deterrence in low-pressure areas, but they usually require frequent reapplication outdoors. Peppermint, rosemary, thyme, and citrus oils lose activity when exposed to rain and ultraviolet light, and concentrated oils can irritate skin, pets, or respiratory systems.
Do not assume “natural” means harmless. Test any product on an inconspicuous surface, keep it away from eyes and animals, and follow its label. Homemade mixtures have variable concentrations and may damage painted finishes, plastics, seals, or plants.
Botanical products are most suitable for sheltered porch corners, occasional web prevention, and homeowners who accept weekly or biweekly maintenance. They are not a dependable solution for a large insect population or a structural infestation.
How Much Does Post-Cleaning Pest Prevention Cost?
Typical DIY prevention costs $25-$150 for caulk, mesh, lighting changes, and a labeled treatment, while professional perimeter service commonly costs $100-$300 per visit. Extensive exclusion, high roofs, large properties, difficult access, or active infestations can raise the total to $300-$1,000 or more.
| Project | Typical material or service cost | Typical time | Appropriate situation |
|---|---|---|---|
| Caulk and screen repairs | $15-$75 | 1-3 hours | Small gaps and damaged screens |
| Lighting conversion | $15-$80 | 15-45 minutes | Bright entryway lighting |
| Botanical maintenance | $10-$25 per application | 20-40 minutes | Low pest pressure |
| DIY labeled residual | $35-$60 per mixed gallon | 1-2 hours | Accessible, approved surfaces |
| Professional perimeter visit | $100-$300 | 30-90 minutes | Recurring exterior pressure |
| Exclusion specialist | $200-$600+ | 2-8 hours | Multiple penetrations or soffit defects |
Prices vary by region, height, access, pest type, and whether repairs are included. Obtain a written description of treated areas, active ingredients, reentry instructions, retreatment terms, and exclusions from any service provider.
Common Failures and How to Fix Them
Webs Return Within Five Days
Check porch lighting, flying insects, nearby vegetation, and sheltered roofline gaps before applying more product. Repeated spraying without correcting the prey source can increase exposure while leaving the underlying attraction unchanged.
Spray Leaves Haze on Windows
Stop broad application near glass and clean the residue according to the product label. Future treatments should use a controlled stream or targeted application on approved frames and joints, not a drifting cloud across the window.
Treatment Washes Away Quickly
Inspect irrigation, downspouts, rain exposure, and cleaning sequence. A treatment applied before final window washing or a surface rinse can be removed immediately, while porous masonry may require a product specifically labeled for that substrate.
Ants Reappear Along the Foundation
Follow the trail to its entry point, then seal the gap after confirming that the repair will not block drainage. Outdoor sprays may suppress visible workers without eliminating a nest, especially when the colony is under paving, mulch, or a wall void.
Wasps Build Nests Under Eaves
Do not seal an active nest into a wall or reach into it unprotected. Identify whether the nest is exposed or inside a cavity, keep people away, and use a licensed professional when stinging-insect access is difficult.
Spiders Persist Despite Treatment
Confirm the species and inspect for egg sacs, prey insects, dense landscaping, and untreated upper corners. Remove accessible webs with a soft brush or extension tool, then correct the attraction source instead of repeatedly coating the entire facade.
When Should You Hire a Professional?
Hire a licensed pest professional when pests enter wall voids, nests are inaccessible, children or pets regularly contact treated areas, the structure is high or difficult to reach, or repeated labeled DIY treatments fail. Professional service is also appropriate for termites, carpenter ants, bed bugs, large wasp nests, and suspected venomous spider species.
Ask the technician for the pest identification, active ingredient, application locations, weather restrictions, reentry interval, pollinator precautions, and expected retreatment schedule. A responsible treatment plan should include sanitation, exclusion, moisture control, or landscape changes when those conditions contribute to the infestation.
A professional cannot guarantee a permanently pest-free exterior. Outdoor insects continually enter from neighboring vegetation, lighting, soil, and weather conditions. The realistic goal is lower pressure and fewer webs, nests, and indoor entry events.
Seasonal Maintenance Schedule
Inspect after spring cleaning, because rising temperatures increase insect activity and newly washed surfaces expose gaps. Repeat the perimeter inspection in midsummer, when lighting, irrigation, and vegetation often create the highest pressure.
| Season | Main task | Specific inspection |
|---|---|---|
| Spring | Clean, dry, seal, and treat if needed | Eaves, screens, caulk, winter damage |
| Early summer | Control attraction sources | Lights, irrigation, shrubs, webs |
| Late summer | Repair recurring entry points | Door sweeps, foundation gaps, nests |
| Autumn | Remove shelter and debris | Leaf piles, firewood, clogged gutters |
| Winter | Plan repairs | Soffits, screens, trim, drainage |
FAQ
Does pressure washing kill spiders permanently?
Pressure washing can remove webs, egg sacs, insects, and some exposed spiders, but it does not permanently prevent reinfestation. Spiders can return when flying insects, sheltered eaves, outdoor lighting, and nearby vegetation remain available. Cleaning should therefore be followed by drying, exclusion, habitat reduction, and targeted treatment when justified.
Should you spray before or after exterior cleaning?
Complete exterior cleaning first, allow the structure to dry for at least 24-48 hours, then apply a labeled product if treatment is necessary. Spraying before washing wastes the residual because the cleaning process can remove it. Product labels may specify different drying, temperature, rain, or surface requirements.
What is the best natural way to keep spiders away?
The best low-chemical approach combines sealed gaps, trimmed vegetation, reduced nighttime lighting, dry foundations, and regular web removal. Peppermint or other essential-oil products may provide short-term deterrence, but outdoor rain and sunlight commonly reduce their effect within 7-14 days.
Are exterior spider sprays safe around pets?
Exterior spider sprays are safe around pets only when the product label permits the use and the application, drying, and reentry instructions are followed. Keep pets away during treatment, prevent access to wet surfaces, remove water and food bowls, and avoid treating areas where animals routinely lie or groom themselves.
How often should exterior pest prevention be repeated?
Inspect the property at least twice yearly and after major cleaning, storms, landscaping changes, or an increase in webs. Residual treatments commonly last 30-90 days outdoors, while botanical products may require reapplication every 7-14 days. Exclusion repairs can last years when installed correctly and kept dry.
Can exterior cleaning prevent ants from entering the house?
Exterior cleaning alone rarely prevents ants from entering. Washing may remove trails temporarily, but ants can establish new routes from soil, mulch, trees, cracks, utility penetrations, or moisture-damaged trim. Find and seal the entry point, correct moisture conditions, and use a labeled ant-control method when needed.
The Bottom Line
The reliable way to keep spiders and bugs away after exterior cleaning is to combine dry-time discipline, structural exclusion, reduced insect attraction, vegetation and moisture control, and targeted labeled treatment. Exterior washing removes the old evidence of pests, but the prevention sequence determines whether clean siding stays relatively free of webs and recurring insect activity.