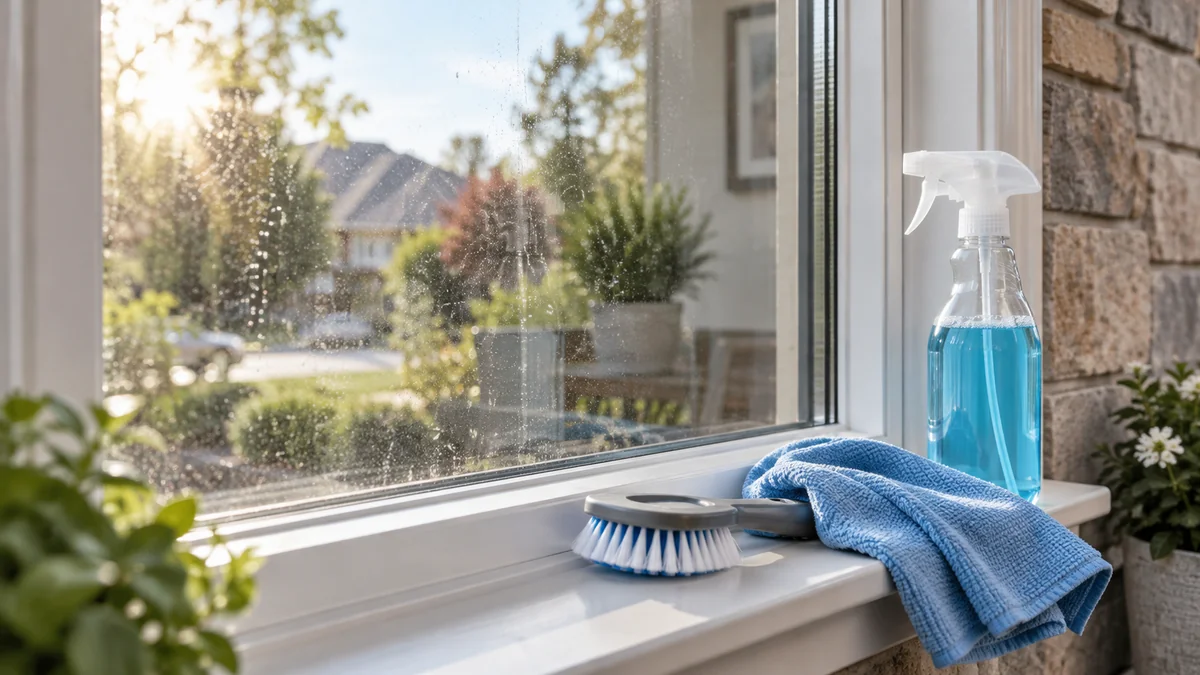
To clean replacement windows safely, remove dry debris, wash screens, clean the glass with a mild solution, wipe frames and tracks, clear weep holes, and apply dry silicone lubricant where appropriate. A typical double-hung window takes 15-20 minutes, and the main success factors are using clean water, avoiding abrasives, and following the sash manufacturer’s tilt instructions.
Key Facts at a Glance
Clean replacement windows twice yearly, with extra cleaning after pollen, construction, or severe storms.
Use a clean microfiber cloth, a quality squeegee, and mild soap or a diluted vinegar solution on compatible surfaces.
Low-E coatings are normally sealed inside insulated glass units, but aftermarket films can be exposed and require gentler handling.
Vacuum tracks before adding liquid because wet dirt forms a paste that can obstruct sash movement.
Never pressure-wash replacement windows or force a sash that does not tilt smoothly.
Persistent fogging between panes indicates insulated-glass seal failure, not dirty interior or exterior glass.
Before You Start: Time, Tools, and Safety
A complete replacement-window cleaning requires 15-20 minutes per accessible window, $15-$30 in reusable supplies, and moderate care rather than specialist skill. Cleaning a 15-window home typically takes 4-5 hours when screens, tracks, frames, and both sides of the glass receive attention.
| Item | Typical quantity or specification | Purpose |
|---|---|---|
| Microfiber cloths | 6-10, lint-free, 300-500 GSM | Glass, frames, edges, and final buffing |
| Squeegee | 10-14-inch rubber blade | Removing solution without streaks |
| Distilled water | 1-2 gallons for a house | Reducing mineral spots |
| Mild dish soap | 1-2 drops per quart | Cutting grease and pollen |
| Soft vacuum brush | 1 attachment | Dry debris in tracks and corners |
| Soft nylon brush | 1, 2-4 inches wide | Screens and stubborn track dirt |
| Dry silicone lubricant | 1 small can | Compatible sliding surfaces |
| Pipe cleaner | 1-2 | Clearing weep-hole passages |
Move furniture, blinds, and curtains away from the opening. Place a towel beneath the sill, especially on wood interiors, because pooled water can damage paint, sealants, flooring, or unfinished wood.
Check the window label, installation manual, or manufacturer website before removing a sash. Tilt latches and release tabs differ among brands, and a sash that feels unusually heavy may have a balance or hardware problem.
Which Cleaner Is Safe for Replacement Windows?
Mild dish soap mixed with water is the safest general-purpose choice for glass, vinyl, fiberglass, and exterior metal cladding. A solution of one part distilled white vinegar to four parts distilled water can reduce mineral residue on compatible glass, but strong vinegar mixtures should not be used on unlacquered aluminum.
| Surface or component | Recommended cleaner | Avoid | Reason |
|---|---|---|---|
| Insulated glass | Distilled water with 1-2 drops soap per quart | Abrasive powders and blades | Protects seals, coatings, and surface finish |
| Vinyl frame | Mild soap and water | Acetone, bleach, abrasive pads | Solvents can discolor or soften PVC |
| Fiberglass frame | Mild soap or diluted vinegar on glass | Strong alkaline cleaners and solvents | Factory coatings can lose gloss or color |
| Wood interior | Damp cloth with wood-safe cleaner | Saturation and standing water | Moisture can swell joints and coatings |
| Aluminum frame | Mild soap and water | Strong acids and aggressive vinegar | Unlacquered aluminum can oxidize or pit |
| Insect screen | Water, mild soap, soft nylon brush | Pressure washer and stiff wire brush | High force can stretch mesh or bend the frame |
Spray the cloth or glass rather than flooding joints and frame corners. Excess liquid can enter drainage channels, hardware cavities, or unfinished wood.
Step 1: Inspect the Window Before Cleaning
Inspect the glass, frame, gaskets, screens, sash locks, balances, and exterior drainage openings before applying water. Photograph cracks, failed seals, damaged screens, or loose cladding first because cleaning can make an existing defect harder to document for a warranty claim.
Look for these conditions:
- Crack or chip in the glass: Stop and arrange glazing repair, particularly if the damage reaches an edge.
- Moisture between panes: Treat the insulated glass unit as a failed seal candidate, not as a cleaning problem.
- Torn gasket or displaced sealant: Avoid flooding the area and ask the manufacturer or installer for an approved repair.
- Soft wood, bubbling paint, or swollen trim: Investigate water intrusion before deep cleaning.
- Sash that binds or drops: Do not force the tilt mechanism.
You will know the inspection is complete when the window opens, locks, and drains normally enough to clean without forcing any component. A common mistake is assuming every double-hung replacement window uses the same tilt-latch sequence.
Step 2: Remove and Wash the Screens
Remove insect screens carefully, mark their locations with removable tape, and wash them separately. Screen frames can look identical while using different corner keys or spring clips, so labeling prevents an incorrect refit.
Lay the screen flat outdoors or in a bathtub. Rinse with low-pressure water, apply a small amount of mild dish soap, brush with a soft nylon brush, rinse again, and let the screen dry completely before reinstalling it.
Do not use a pressure washer. A concentrated jet can stretch fiberglass mesh, deform aluminum mesh, loosen spline, or bend a thin frame.
You will know the screen is ready when no water beads carry visible dirt and the mesh remains flat. A common mistake is reinstalling a damp screen, which can transfer moisture and loosened soil back onto the cleaned window.
Step 3: Vacuum Dust, Pollen, and Tracks
Vacuum dry debris before using liquid on the glass or frame. Start with the sill, then clean the lower track, upper sash channel, side channels, sash corners, and the area behind the tilt latches.
Use a soft brush attachment and low suction near weatherstripping. A narrow crevice tool can reach corners, but keep the plastic nozzle away from flexible gaskets so it does not pull or crease them.
Brush cobwebs loose before vacuuming. Remove insect nests, grit, and dead leaves by hand when they are too large for the nozzle.
You will know the track is ready when a dry white cloth passes through it without collecting loose grit. A common mistake is spraying cleaner into a dirty track first, because the resulting slurry can migrate into balances and rollers.
Step 4: Tilt the Sash Safely
Open the lower sash approximately 2-3 inches, press the tilt latches or release tabs simultaneously, and pull the top of the sash inward only as far as the manufacturer permits. Many units tilt to roughly 90 degrees, while others allow the sash to lift out after both sides reach a specific position.
Support the sash with both hands. Keep fingers away from pivot shoes, balance cords, springs, and release points. Do not remove a sash unless the product manual gives a clear removal procedure.
Clean one side at a time if the sash feels heavy. For upper sashes, use the same manufacturer-specific sequence and never stand on a chair or windowsill.
You will know the sash is correctly positioned when it rests evenly without twisting, slipping, or pulling against one corner. A common mistake is forcing one tilt latch when the other has not released, which can damage the latch or balance shoe.
Step 5: Wash and Squeegee the Glass
Mix one of these solutions in a clean container:
- Routine cleaning: 1-2 drops of mild dish soap per quart of distilled water.
- Light mineral residue: 1 part distilled white vinegar to 4 parts distilled water.
- Greasy exterior film: The routine solution with no more than 2 additional drops of soap per quart.
Apply the solution with a microfiber cloth or controlled spray. Keep liquid away from wood joints, sash corners, glazing beads, and hardware openings.
Start at the top corner with a clean 10-14-inch squeegee. Pull vertically in overlapping passes, wipe the rubber blade after each pass, and finish with a dry microfiber cloth around the perimeter.
You will know the glass is clean when it remains clear at several viewing angles after the surface dries. A common mistake is using too much soap, which leaves a surfactant film that resembles streaking.
Why Does Sunlight Cause Window Streaks?
Direct sunlight warms the glass and evaporates water before the squeegee can remove it evenly. Clean the shaded side first, work on a cloudy day when possible, or divide a warm pane into smaller sections that can be wiped before drying.
Glass temperature matters more than air temperature. A cool morning can still produce streaks on a sunlit south-facing pane, while a warmer shaded pane may remain workable.
Step 6: Clean Frames, Sills, and Tracks
Wipe vinyl, fiberglass, and aluminum frames with a damp microfiber cloth and mild soap solution. For wood interiors, use a barely damp cloth followed by immediate drying; do not saturate joints or unfinished edges.
Treat track dirt in stages:
- Vacuum loose material.
- Wipe with mild soap solution.
- Use a soft toothbrush for corners.
- Dry the track completely.
- Apply only manufacturer-approved lubricant if movement remains rough.
Baking soda can help absorb greasy residue, but a vinegar-and-baking-soda reaction is mainly a short-lived fizz, not a powerful cleaning chemistry. Use the mechanical action of the cloth or brush to remove soil rather than relying on the reaction.
You will know the track is clean when the sash travels without gritty resistance and no dark residue appears on a dry cloth. A common mistake is using a Magic Eraser or abrasive pad on vinyl, which can dull the finish and create a visibly different sheen.
Step 7: Clear and Test the Weep Holes
Locate the small drainage slots along the exterior bottom edge of the frame. Remove visible debris with a soft brush or pipe cleaner, using gentle movement rather than forcing a rigid wire deep into the channel.
Pour a small amount of clean water into the exterior drainage path, not into the interior track or lock area. Water should exit outside the frame and should not pool against interior trim.
Do not seal, paint, caulk, or tape over weep holes. These openings are part of the window’s drainage design, and blocking them can redirect water toward the sill or wall assembly.
You will know the weep system works when water exits outdoors within seconds. A common mistake is confusing a weep hole with a balance opening and pushing a tool into a mechanism that should not be disturbed.
Step 8: Lubricate Approved Sliding Surfaces
Use a dry silicone lubricant only when the window manufacturer permits it. Spray the lubricant onto a cloth, then wipe a thin film along compatible vinyl tracks, guides, or metal sliding surfaces instead of spraying broadly into the frame.
Avoid petroleum-based WD-40 on tracks because its oily residue can collect grit and complicate later cleaning. Do not lubricate balance cords, springs, locks, or rollers unless the product manual specifically identifies the lubricant and location.
Operate the sash several times after application. Remove any visible excess with a clean cloth.
You will know lubrication helped when the sash moves more smoothly without leaving an oily line. A common mistake is masking a bent track, failed balance, or shifted sash with lubricant; repeated force can turn a repairable alignment issue into hardware damage.
Frame-Material Rules and Cleaner Choices
Frame material determines which chemicals and moisture levels are acceptable. Glass cleaner that is harmless to a sealed insulated glass unit can still damage painted aluminum, raw wood, or vinyl trim.
| Frame material | Best routine method | Typical restriction | Cleaning frequency |
|---|---|---|---|
| Vinyl PVC | Mild soap, water, microfiber cloth | No acetone, bleach, or abrasive pads | 2 times yearly |
| Fiberglass | Mild soap or diluted vinegar on glass | No strong alkaline cleaner or solvent | 2 times yearly |
| Wood-clad | Damp wood-safe cloth indoors, mild soap on cladding | No saturation or pressure washing | 2 times yearly |
| Aluminum | Mild soap and water | Avoid strong acid on bare aluminum | 2 times yearly |
| Painted metal | Mild soap, soft cloth, immediate drying | Avoid abrasive polishing compounds | 2 times yearly |
Manufacturer instructions override general advice. Some coatings, films, or specialty finishes require a neutral cleaner even when ordinary replacement windows tolerate diluted vinegar.
Hard Water, Paint, Sap, and Adhesive Residue
Hard-water deposits are usually calcium or other mineral residue left by sprinklers, masonry runoff, or mineral-rich tap water. Prevention is easier than removal, so redirect sprinklers and use distilled water for the final rinse when spotting is persistent.
For a light deposit, place a vinegar-and-water solution on a microfiber cloth for a short contact period, then rinse and dry. Test an inconspicuous corner first, especially near aluminum or decorative coatings.
For paint, sap, or adhesive:
- Soften the residue with a warm, damp microfiber cloth.
- Lift softened material with a plastic scraper held nearly flat.
- Repeat rather than increasing force.
- Rinse away the cleaner and dry the area.
Do not use a razor blade automatically. Low-E coatings are normally protected within the sealed glass unit, but exposed films and surface treatments can be scratched, and tempered or laminated glass can also suffer permanent surface damage.
Professional glass restoration is appropriate when mineral etching remains after gentle cleaning. A cleaner can remove a deposit while leaving the underlying etched mark, because chemical damage is not the same as removable dirt.
Common Mistakes and How to Fix Them
| Mistake | Visible symptom | Recovery |
|---|---|---|
| Cleaning in direct sun | Immediate vertical streaks | Rinse lightly, move to shade, resqueegee |
| Too much dish soap | Hazy or oily film | Rewash with plain distilled water |
| Paper towels or newspaper | Lint or ink transfer | Wipe with clean microfiber |
| Pressure washing | Loose gasket, water intrusion, damaged screen | Stop use and inspect seals |
| Forcing a sash | Tilt latch or balance damage | Stop, consult the manual or installer |
| Spraying into joints | Wet trim or trapped moisture | Dry immediately and inspect wood |
A practitioner rule is to change the cloth before it looks dirty. A cloth that carries grit can scratch glossy trim even when the grit is too small to see.
Another useful rule is to clean the glass before polishing the frame. Frame residue can run onto already-finished glass, forcing a second glass pass.
Replacement windows are also poor candidates for routine pressure washing. The spray can drive water past gaskets, damage insect screens, strip cladding finishes, and disturb sealants around the opening.
When Should You Clean or Repair the Window?
Cleanable dirt appears on the exterior or interior surface and changes when wiped. A repair condition remains between panes, inside a failed coating, beneath damaged sealant, or within a distorted frame.
| Symptom | Likely cause | Correct action |
|---|---|---|
| Fog between panes | Failed insulated-glass seal | Check warranty; replace sash or IGU |
| Water on interior sill | Blocked drainage, leakage, or condensation | Test weeps and inspect installation |
| Sash sticks | Dirt, dry track, alignment, or balance fault | Clean, dry, lubricate, then inspect hardware |
| White mineral haze | Hard-water deposit or glass etching | Gentle treatment; restoration if etched |
| Cracked pane | Impact or thermal stress | Stop cleaning and arrange glazing repair |
| Peeling wood finish | Moisture exposure or coating failure | Dry area and obtain wood repair advice |
Failed insulated-glass seals cannot be restored by surface cleaning. The moisture is inside the sealed cavity, so repeated glass cleaning only removes fingerprints from the two exposed faces.
Stop DIY work when a window is above a safe reach, the sash must be removed without clear instructions, the glass is cracked, or water intrusion has affected wall materials. A professional cleaner should carry appropriate insurance for multistory access, while a glazier or installer is better suited to seal failure, balance failure, and damaged framing.
How Often Should Replacement Windows Be Cleaned?
Most homes need two full cleanings each year, usually in spring and autumn. Homes near unpaved roads, coastlines, construction sites, agricultural fields, or heavy tree cover may need quarterly glass cleaning and annual track cleaning.
| Exposure or household condition | Glass schedule | Track and screen schedule |
|---|---|---|
| Low-dust suburban home | Every 6 months | Every 12 months |
| Heavy pollen or mature trees | Every 3-4 months | Every 6 months |
| Coastal salt exposure | Every 2-3 months | Every 3-6 months |
| Active construction nearby | Monthly during work | Every 1-3 months |
| Sprinklers hitting glass | As needed after deposits | Inspect monthly |
| Multistory or difficult access | 1-2 times yearly professionally | During each service |
A quick glass-only cleaning can take 5-8 minutes per accessible window. A full service that includes screens, tracks, frame edges, drainage, and hardware inspection typically takes 15-20 minutes.
What Does Replacement-Window Cleaning Cost?
DIY supplies typically cost $15-$30 when the household already has a bucket and vacuum. Professional residential cleaning commonly costs $10-$25 per window, while a whole-house visit often falls around $150-$400, depending on region, access, screens, window count, and condition.
| Service scope | Typical cost | Typical time | Main price variable |
|---|---|---|---|
| DIY glass-only cleaning | $5-$15 consumables | 5-8 minutes/window | Existing tools |
| DIY full cleaning | $15-$30 supplies | 15-20 minutes/window | Number of screens |
| Professional accessible windows | $10-$25/window | 8-15 minutes/window | Local labor rate |
| Professional whole house | $150-$400 | 2-5 hours | Access and window count |
| High or difficult access | $20-$50+/window | 15-30 minutes/window | Ladders, lifts, insurance |
These are typical planning ranges, not fixed prices. Request a written scope that states whether screens, tracks, sills, exterior frames, hard-water treatment, and ladder work are included.
FAQ
Can I Clean Replacement Windows From Inside the House?
Yes, many double-hung replacement windows tilt inward so both glass surfaces can be reached from indoors. Open the sash only after confirming the manufacturer’s latch procedure, keep the sash supported, and use an extension tool or insured professional for upper-story windows that cannot be reached safely.
Is Vinegar Safe for Low-E Windows?
Diluted vinegar is generally suitable for exposed glass when the manufacturer permits household vinegar solutions, but it should not be assumed safe for every frame or aftermarket film. Low-E coatings are usually sealed within the insulated glass unit; exposed films and bare aluminum require separate precautions.
Why Are My Windows Still Foggy After Cleaning?
Fog that remains between the panes indicates moisture inside the insulated glass unit, usually from a failed perimeter seal. Exterior and interior cleaning cannot reach that cavity. Record the unit information and ask the installer or manufacturer whether a sash or glass-unit warranty applies.
Can I Use Windex on Replacement Windows?
A standard glass cleaner may be acceptable on some glass surfaces, but mild soap and distilled water provide a lower-risk universal starting point. Keep any cleaner away from wood, painted aluminum, vinyl joints, and exposed films, and follow the window manufacturer’s chemical restrictions.
How Do I Clean Window Tracks Without Removing the Sash?
Vacuum the track, wipe it with diluted mild soap, use a soft toothbrush for corners, and dry it fully. If the sash still binds, apply a thin film of manufacturer-approved dry silicone to a cloth. Do not flood the track or force the sash.
Should I Hire a Professional Window Cleaner?
Hire a professional when windows require ladder or lift access, a sash is heavy or damaged, glass is cracked, or water intrusion is present. DIY cleaning is reasonable for accessible windows with intact hardware, clear manufacturer instructions, and a safe working position.
The Bottom Line
To clean replacement windows, vacuum first, wash screens separately, use mild soap or a compatible diluted vinegar solution, squeegee the glass in overlapping passes, wipe the frame and track, test the weep holes, and lubricate only approved sliding surfaces. Clean twice yearly, avoid pressure washing and abrasive tools, and treat fogging between panes or forced sash movement as repair conditions rather than cleaning tasks.