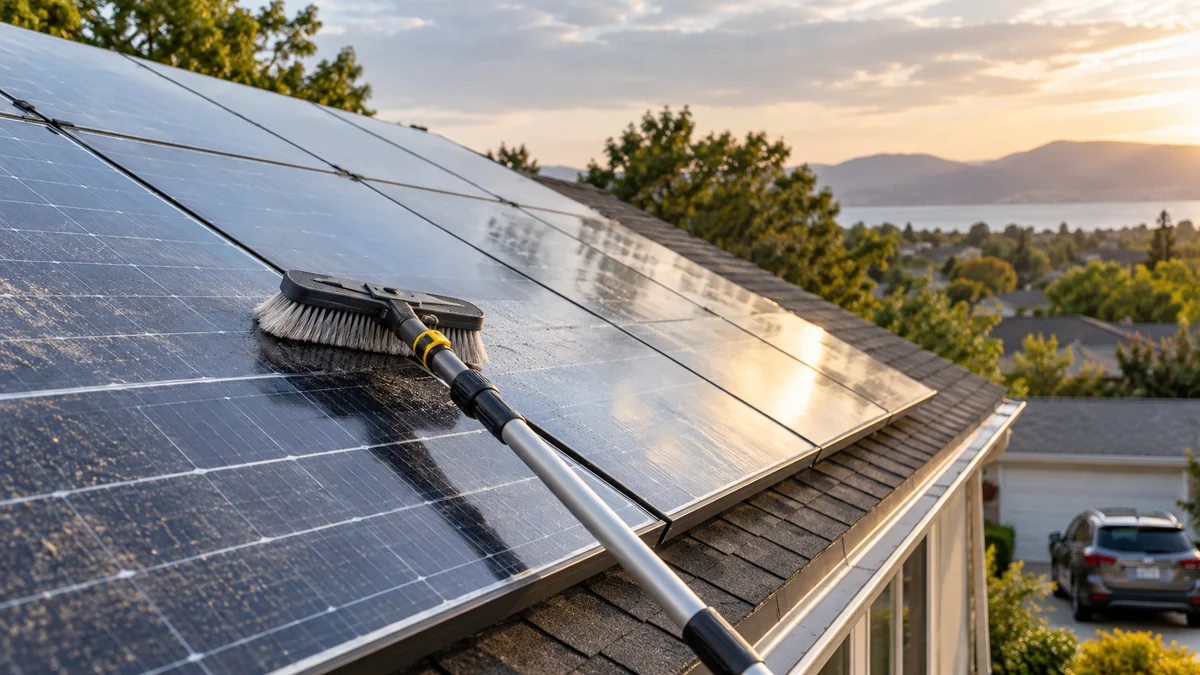
To maintain solar panels for maximum efficiency, monitor production, remove damaging deposits, inspect the array and balance-of-system equipment, and correct faults before they reduce generation. Most homeowners need visual checks weekly, cleaning about twice yearly, and a professional electrical inspection annually, with climate, panel angle, dust, snow, and bird activity determining the exact schedule.
Key Facts at a Glance
- Solar-panel maintenance combines monitoring, cleaning, visual inspection, and electrical servicing.
- Typical residential arrays need cleaning twice per year, but dusty, pollen-heavy, coastal, or agricultural sites may need quarterly cleaning.
- A dirty panel can lose approximately 3-5% of output under ordinary soiling; severe droppings, ash, or thick dust can cause much larger local losses.
- Solar modules usually degrade naturally by about 0.3-0.5% of rated output per year, depending on product, climate, and warranty terms.
- Homeowners should not open inverters, disconnect live wiring, measure string voltage, or walk on modules.
- A persistent production decline after cleaning usually indicates shading, inverter trouble, wiring damage, a failed bypass diode, or module degradation rather than dirt alone.
What Solar Panel Maintenance Protects
Solar-panel maintenance protects the light path, cell temperature, electrical connections, mounting structure, and monitoring data that together determine delivered energy. Photovoltaic cells convert photons into electrical current; dust, bird droppings, salt, leaves, shade, heat, corrosion, and loose connections interfere with different parts of that process.
Soiling blocks or scatters incoming light. A small deposit can also create uneven illumination across a module, forcing bypass diodes to operate and reducing the output of a larger cell group. Bird droppings are especially disruptive because a compact opaque patch can shade cells more severely than an even film of dust.
Temperature also matters. A module rated under standard test conditions near 25°C cell temperature produces less power when its cells become hotter. Cleaning does not eliminate heat, but clean glass absorbs and scatters less light, while unobstructed surfaces retain their designed optical performance.
Maintenance does not make a panel generate above its rated power. Its purpose is to prevent avoidable losses and identify failures while warranties, insurance, and replacement options remain available.
Before You Start
Safety checklist
Solar-panel cleaning is suitable for ground-mounted arrays and low-risk accessible systems, not for every roof. A fall from a roof is more dangerous than the likely energy gain from removing light dust, so use a qualified solar or roof professional when the array requires ladders, steep access, fragile tiles, or work near overhead electrical conductors.
| Item | Typical requirement | Homeowner limit |
|---|---|---|
| Cleaning frequency | 2 times per year | Increase to every 3 months in high-soiling areas |
| Cleaning duration | 30-120 minutes | Ground arrays are usually safer |
| Water volume | 10-40 litres for a small array | Use low-pressure flow |
| Brush | Soft, non-abrasive head | No wire or stiff shop brush |
| Water temperature | Cool to lukewarm | Avoid thermal shock |
| Professional inspection | Once per year | Required for electrical tests |
| Roof access | Site-specific | Do not walk on modules |
You need a soft solar-cleaning brush, a water-fed pole or hose with gentle flow, a clean rubber squeegee, microfiber cloths for accessible frames, and filtered or deionized water where local tap water leaves visible mineral deposits. Check the module manufacturer’s warranty and cleaning instructions first.
Do not use a pressure washer, abrasive pad, razor scraper, bleach, solvent, ammonia-based window cleaner, or household dish detergent unless the manufacturer specifically permits it. Do not assume that switching off an inverter makes roof-level DC conductors safe during daylight.
How Often Should You Clean Solar Panels?
Most residential solar panels should be cleaned twice per year, while quarterly cleaning is more appropriate for dry, dusty, agricultural, industrial, coastal, or high-pollen locations. The best trigger is the combination of visible soiling and a sustained output decline after adjusting for weather, not a rigid calendar alone.
| Site condition | Typical cleaning interval | Main contaminant | Practical trigger |
|---|---|---|---|
| Temperate roof, 20-40° tilt | 6-12 months | Dust and pollen | Visible film or 3-5% normalized decline |
| Desert or dry interior | 1-3 months | Dust and sand | Dust film after wind events |
| Agricultural property | 2-3 months | Soil, fertilizer, pollen | Repeated dust during field activity |
| Coastal installation | 3-6 months | Salt aerosol | Hazy residue or sea-spray deposits |
| Snow-prone site | After major melt events | Snow, grit, ice | Persistent coverage or blocked drainage |
| Urban or industrial site | 3-6 months | Soot and grime | Dark residue or localized deposits |
Steeper modules generally shed loose dust better during rain, but rain does not reliably remove oily grime, bird droppings, pollen paste, ash, or mineral deposits. A roof under trees may need more attention than a roof in a dry climate because leaves, sap, moss, and bird activity create concentrated shading.
When is rain enough?
Rain is enough when it removes visible loose contamination and the system’s weather-adjusted output remains near its established baseline. Rain is not enough when deposits remain after several storms, water spots accumulate, bird droppings persist, or monitoring shows a repeatable shortfall during comparable sunny conditions.
Measure the decision rather than guessing. Compare a clear day’s production with similar historical irradiance, temperature, and shading conditions. A cloudy day after cleaning cannot demonstrate that cleaning improved performance.
Step 1: Establish a Production Baseline
Record the system’s normal generation before cleaning so you can separate a maintenance improvement from ordinary weather variation. Use the inverter portal, utility meter, energy-management system, or a manual daily log, and compare several clear days rather than one isolated reading.
Record:
- Date and generation in kilowatt-hours.
- Peak power in kilowatts.
- Weather, including cloud cover and unusual heat.
- Any new shade from trees, construction, antennas, or seasonal sun position.
- Inverter warnings, fault codes, and communication outages.
For systems with module-level monitoring, compare individual module or optimizer output. One low-producing module is a different problem from an entire string producing less energy. For string inverters, compare current strings only when the monitoring platform exposes those values safely.
You will know the baseline is useful when at least three comparable sunny days produce a recognizable range rather than one unexplained number.
Common mistake: comparing winter production with summer production. Seasonal sun angle and day length can overwhelm any cleaning effect.
Step 2: Inspect the Site Before Touching the Panels
Inspect the ground, roof surroundings, cables, drainage paths, and shade sources before washing. A dirty module may be the visible symptom of a bird nest, tree growth, damaged flashing, displaced racking, or a cable hanging against the roof.
Look for cracked glass, frame separation, bubbling or delamination, brown or yellow discoloration, moisture inside junction areas, exposed conductors, chewed insulation, rust, loose clamps, and debris under modules. “Snail trails,” which appear as thin dark lines, can be associated with cell microcracks and moisture-related changes, although visual inspection alone cannot confirm the failure.
Stop and call a qualified technician if you find:
- Exposed or damaged electrical cable.
- A cracked module or broken junction box.
- Repeated inverter ground-fault or insulation alarms.
- Smoke, burning odor, melted connectors, or scorch marks.
- Loose modules, damaged roof attachments, or structural movement.
- Water entering the inverter or battery enclosure.
You will know the inspection is complete when every module row, accessible cable route, inverter enclosure, and mounting area has a documented condition.
Common mistake: tightening an electrical connector or opening an inverter without the correct isolation procedure and test equipment.
Step 3: Choose a Safe Cleaning Window
Clean during a cool, dry period, normally early morning or late afternoon, when module surfaces are not hot and direct sun is weaker. Avoid washing during freezing weather, thunderstorms, high winds, or a period when roof surfaces will remain dangerously slippery.
Cold water on very hot glass can create thermal stress, although the risk varies with module construction, water temperature, and surface temperature. The practical rule is simple: never spray cold water onto a sun-heated module.
If the array is connected to a modern inverter, follow the manufacturer’s shutdown instructions rather than assuming a universal sequence. Some systems continue producing DC voltage in daylight even after AC output is disconnected. A professional must handle electrical isolation when cleaning requires contact with wiring, connectors, junction boxes, or inverter equipment.
You will know the timing is suitable when the glass is cool to the touch, wind is low, and no precipitation or frost is expected.
Common mistake: choosing the hottest part of the day because the panels appear easier to see.
Step 4: Remove Loose Debris Without Scratching
Remove leaves, twigs, insects, and loose grit with a soft, clean brush before applying water. Use a telescoping pole from a safe position, and keep the brush moving lightly rather than grinding particles across the glass.
Do not step on modules. Even if the glass does not break immediately, concentrated foot pressure can damage cells, frames, seals, and hidden interconnections. Walking on a roof can also void product or installation warranties and create a fall hazard.
Clear debris around, rather than inside, electrical enclosures. Bird nests and accumulated vegetation should be removed only when doing so does not disturb live equipment or protected wildlife.
You will know the step worked when loose material is gone without visible scratches, frame dents, or displaced cables.
Common mistake: using a stiff-bristle brush that traps sand between the bristles and the glass.
Step 5: Wash With Suitable Water and Minimal Detergent
Rinse the module with low-pressure filtered or deionized water, then gently clean remaining deposits with a soft non-abrasive brush. Use a small amount of manufacturer-approved, pH-neutral soap only when water cannot remove pollen film, bird residue, or oily grime.
Work from the upper edge downward. Keep water away from cracked modules, open connectors, damaged junction boxes, and inverter vents. Never direct a concentrated high-pressure stream at module edges, seals, connectors, or the underside.
Hard water can leave calcium or magnesium spots as it dries. If you must use ordinary tap water, rinse thoroughly and remove standing droplets with a clean rubber squeegee. A water-softening or deionization system may be worthwhile for large arrays or areas with high mineral content.
You will know the panel is clean when the glass has an even appearance, no bird residue remains, and drying leaves no visible mineral rings.
Common mistake: adding too much soap. Detergent residue can attract dust and create a film that reduces optical transmission.
Step 6: Check the Inverter, Battery, and Mounting System
Inspect inverter ventilation openings, display messages, battery enclosure condition, racking, clamps, and accessible cable routes without opening electrical compartments. Inverters commonly last around 10-15 years, while modules often carry performance warranties of 25-30 years; the shorter-lived power electronics deserve regular monitoring.
| Component | Homeowner check | Professional service |
|---|---|---|
| String inverter | Display, app status, ventilation blockage | Internal inspection and electrical tests |
| Microinverter | Module-level alerts and communication | AC circuit and connector diagnosis |
| Battery | State of charge, temperature alerts, enclosure | High-voltage isolation and capacity tests |
| Racking | Rust, movement, missing hardware | Torque, roof attachment, structural review |
| Tracking system | Alignment, unusual noise, stopped movement | Motor, gearbox, bearing, and control service |
Keep inverter air passages clear of leaves, dust, stored materials, and nests. Do not hose the enclosure. A repeated error code is a maintenance finding, not a nuisance notification that should be reset indefinitely.
Professional technicians may test insulation resistance, open-circuit voltage, short-circuit current, operating current, grounding, connector integrity, and thermal patterns. These tests require equipment and procedures that homeowners should not improvise.
You will know this step is complete when the monitoring system shows no unresolved alarms and the array has no obvious mechanical or environmental obstruction.
Common mistake: resetting a tripped breaker repeatedly. A recurring trip can indicate insulation damage, water ingress, overload, or equipment failure.
Step 7: Verify Output and Escalate Abnormal Results
Check production again after cleaning and compare it with the baseline under similar irradiance and temperature. A successful cleaning normally produces a modest improvement when soiling was moderate; a dramatic change suggests severe contamination, partial shading, or a previously obstructed module.
Call a professional when output remains unexpectedly low, one string diverges from the others, or a module reports repeated optimizer or microinverter faults. Thermal imaging can identify hot cells, bypass-diode problems, loose connections, and abnormal connector resistance, but a thermal image needs electrical and irradiance context to avoid false conclusions.
The National Renewable Energy Laboratory’s PV performance guidance emphasizes comparing measured production with expected output under actual weather conditions, rather than treating rated capacity as a constant daily target. Rated power is a laboratory reference, not a promise that a system will produce the same amount in winter, clouds, heat, or shade.
You will know the maintenance worked when the post-cleaning production trend returns toward its weather-adjusted baseline and no new alarms appear.
Common mistake: replacing a panel before checking shading, monitoring communication, inverter clipping, or a tripped circuit.
Which Components Need Attention Most Often?
Modules usually need the least technical service, while inverters, batteries, trackers, connectors, and roof attachments create more serious inspection requirements. Cleaning the glass cannot correct a failed bypass diode, corroded connector, inverter fault, tree shadow, or loose mounting rail.
| Component | Typical service life | Maintenance priority | Typical professional action |
|---|---|---|---|
| Monocrystalline module | 25-40 years | Low to moderate | Visual inspection and output comparison |
| Polycrystalline module | 25-35 years | Low to moderate | Cleaning and degradation review |
| Thin-film module | 10-25 years | Moderate | Seal, moisture, and output inspection |
| String inverter | 10-15 years | Moderate to high | Ventilation, alarms, electrical diagnosis |
| Microinverter | 15-25 years | Moderate | Module-level fault and communications check |
| Fixed racking | 25-40+ years | Moderate | Corrosion, fasteners, roof attachments |
| Single-axis tracker | 15-25 years | High | Alignment, motors, bearings, controls |
| Lithium-ion battery | 10-15 years typical | High | Temperature, alarms, capacity, isolation |
Natural module degradation is often approximately 0.3-0.5% per year for modern products, but the warranty datasheet controls the expected value. Maintenance can reduce avoidable accelerated damage; it cannot reverse normal semiconductor aging.
Adapt the Schedule to Climate and Mounting
Desert and agricultural sites
Clean every 1-3 months when dust accumulates visibly or production falls against a weather-adjusted baseline. Preventive cleaning is more valuable after harvest, grading, construction, or high-wind events because fine particles can combine with dew and form a stubborn film.
Tropical and high-rainfall sites
Rain removes loose dust but may leave organic residue, salt, algae, and bird droppings. Inspect monthly for vegetation, nests, corrosion, and blocked drainage, then clean two to four times per year according to actual deposits.
Snow and freezing climates
Do not chip ice with metal tools or pour hot water onto cold glass. Allow safe melt where possible, remove only accessible loose snow with a purpose-made soft roof tool, and inspect for ice damage, displaced racking, and cable stress after heavy storms.
Coastal locations
Salt deposits can remain after rain and promote corrosion on frames, fasteners, and connectors. Rinse with suitable low-mineral water at a practical interval, inspect exposed metal, and address corrosion before it reaches structural or electrical components.
Ground-mounted systems
Ground arrays are usually safer for cleaning, but vegetation control becomes essential. Keep grass, vines, weeds, and seasonal crops below the shading line, while maintaining enough clearance to prevent tools and mowers from contacting modules or cables.
Common Mistakes and How to Fix Them
| Mistake | Likely consequence | Correct response |
|---|---|---|
| Pressure washing module edges | Seal or connector water ingress | Stop using pressure; arrange inspection if alarms appear |
| Using abrasive pads | Permanent micro-scratches | Replace damaged cleaning tools; document glass condition |
| Washing hot glass | Thermal stress risk | Wait until the surface cools |
| Using hard tap water | Mineral spotting and residue | Final-rinse with filtered or deionized water |
| Walking on modules | Cell cracks and warranty issues | Use safe roof access or hire a technician |
| Ignoring monitoring alerts | Delayed inverter or string failure | Record the code and arrange diagnosis |
| Trimming trees without checking seasons | Recurring shade or unsafe work | Plan pruning and maintain a shade-free solar window |
| Cleaning only the glass | Hidden electrical and structural faults | Include cables, racking, inverter, and drainage in inspections |
A common practitioner rule is to fix concentrated shading before washing an entire array. One leaf, dropping, or bird nest over a sensitive cell area can cause more loss than a thin uniform dust layer.
Another rule is to photograph unusual conditions before moving anything. Photos help technicians distinguish new damage from old staining, prove storm-related claims, and support warranty discussions.
Costs, Time, and DIY Limits
Typical residential cleaning costs range from about $100-$300 when a professional must supply access equipment, deionized water, insurance, and labor. DIY supplies may cost $20-$80, but roof access, water treatment, and safety equipment can eliminate the apparent saving.
| Task | Typical DIY cost | Typical professional cost | Frequency |
|---|---|---|---|
| Ground-array cleaning | $20-$60 | $100-$250 | 2-4 times yearly |
| Roof-array cleaning | Not recommended for unsafe access | $150-$400 | 1-4 times yearly |
| Visual maintenance visit | $0-$30 | $100-$250 | Every 6-12 months |
| Electrical inspection | Not recommended | $150-$400 | Annually or after faults |
| Thermal imaging | Equipment rarely economical | $150-$500 | After abnormal output |
| Inverter replacement | Not a DIY task | $1,000-$3,000 typical residential range | Often 10-15 years |
Prices vary by country, array size, roof height, access, travel, labor rates, and whether repairs are included. A maintenance contract can be economical for commercial arrays, trackers, remote sites, and systems whose downtime costs more than scheduled service.
Professional cleaning is not automatically worthwhile after every light rain. The value comes from recovered production, avoided damage, safe access, and early fault detection.
What If Solar Output Falls?
A sudden fall of 20% or more deserves investigation, but the cause is not always dirt. First check utility outages, inverter status, new shade, weather, monitoring communications, and circuit-breaker position; then inspect for debris and compare individual strings or modules.
| Symptom | More likely causes | Safe first action |
|---|---|---|
| Zero generation | Grid outage, inverter shutdown, tripped breaker | Check app and breaker status without opening equipment |
| Gradual whole-system decline | Soiling, seasonal shade, inverter aging | Clean if safe and compare weather-adjusted output |
| One module low | Optimizer, microinverter, shade, module fault | Review module monitoring and request service |
| Ground-fault alarm | Wet cable, damaged insulation, connector failure | Keep clear and call a qualified technician |
| Output falls after rain | Water ingress, drainage problem, communication fault | Record alarm and arrange inspection |
| Hot spot on thermal scan | Cell crack, diode or connector problem | Stop DIY testing; technician diagnosis required |
Do not judge system health from a single cloudy day or from the inverter’s instantaneous power alone. Daily energy, irradiance, temperature, clipping, and seasonal sun angle provide a more useful comparison.
Frequently Asked Questions
Can I clean solar panels with ordinary tap water?
You can use tap water when its mineral content is low and you rinse and squeegee thoroughly, but hard water can leave calcium spots. Filtered or deionized water is safer for repeated cleaning. Test the result on one accessible module first, and avoid detergents unless the manufacturer permits a pH-neutral product.
Does dirty glass permanently damage a solar panel?
Ordinary dust usually causes temporary optical loss, but prolonged deposits can retain moisture, encourage biological growth, stain glass, and create localized hot spots when opaque debris shades cells. Ash, bird droppings, salt, and industrial grime deserve faster removal than a thin, even dust film.
Should I turn off solar panels before cleaning them?
Follow the system manufacturer’s shutdown procedure, but do not assume that switching off the inverter removes daylight DC voltage at the modules. Homeowners should avoid touching connectors and wiring. A qualified technician should perform electrical isolation when cleaning or inspection involves energized equipment.
How can I tell whether a panel is failing?
A failing panel may show recurring low module output, a hot spot, cracked glass, delamination, snail trails, discoloration, or repeated optimizer or microinverter alarms. Visual symptoms are not conclusive, so a technician should combine module monitoring with electrical measurements and, when appropriate, thermal imaging.
Is professional solar-panel maintenance worth the cost?
Professional service is usually worthwhile for steep roofs, large arrays, difficult access, recurring alarms, commercial systems, trackers, and locations where lost generation is expensive. For a safe ground-mounted residential array with light soiling, careful homeowner cleaning and monitoring may provide most of the practical benefit.
How long do solar panels remain efficient?
Many modern modules continue producing useful electricity for 25-40 years, with manufacturer performance warranties commonly covering 25-30 years. Output declines gradually, often around 0.3-0.5% annually, while inverters, batteries, trackers, seals, and connectors may require service or replacement earlier.
The Bottom Line
To maintain solar panels for maximum efficiency, establish a production baseline, inspect the whole system, clean cool modules with soft tools and suitable water, monitor results, and escalate electrical or structural faults to a qualified professional. Clean twice yearly as a starting point, then adapt the schedule to dust, pollen, salt, snow, rainfall, tilt, shade, and bird activity.